How to set up Testimonials on your website?
The Testimonials app allows you to collect feedback from your visitors and display it on your website. This helps build trust with your customers and fosters clearer communication.
1. If you haven't activated the Testimonials app yet, please follow this link: https://magic.hocoos.com/apps and click the "Activate" button under the Testimonials app.

- We'll start by creating a form where your visitors can leave feedback. To do this, open the Testimonials app and click the "New Form" button to get started.

- You’ll need to complete three steps: Form Content, Confirmation, and Requests & Triggers. We’ll start with the Form Content.
Form's content:
-
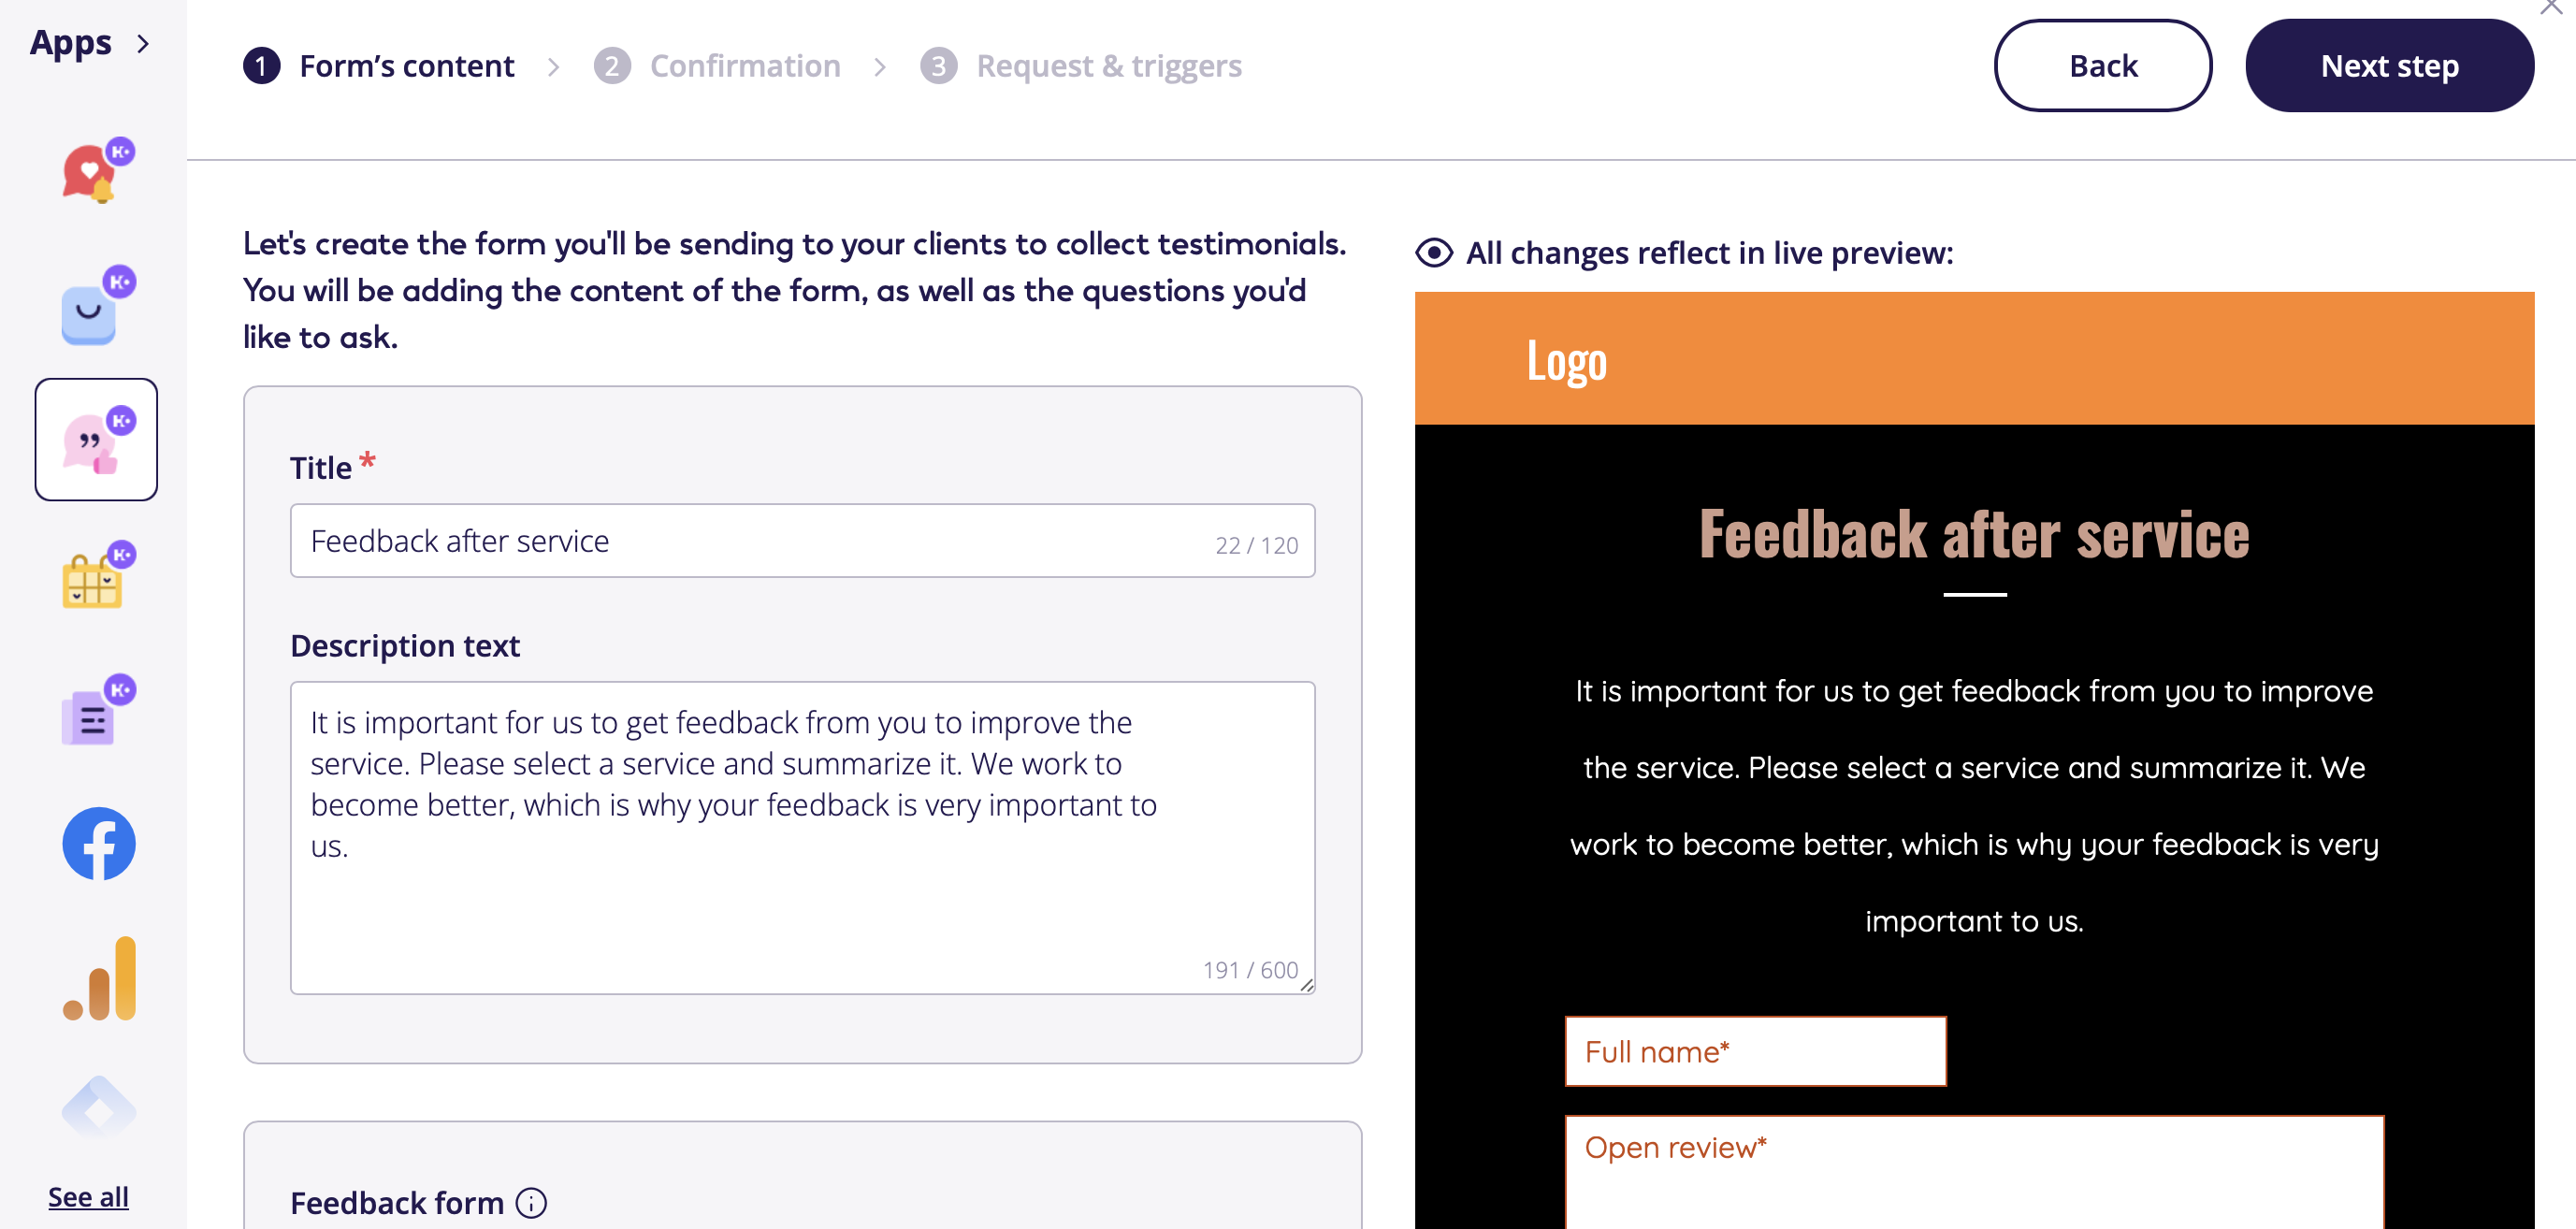
First, add a title and description to your form so that visitors understand its purpose. You can either use pre-made templates or customize your own title and description.

-
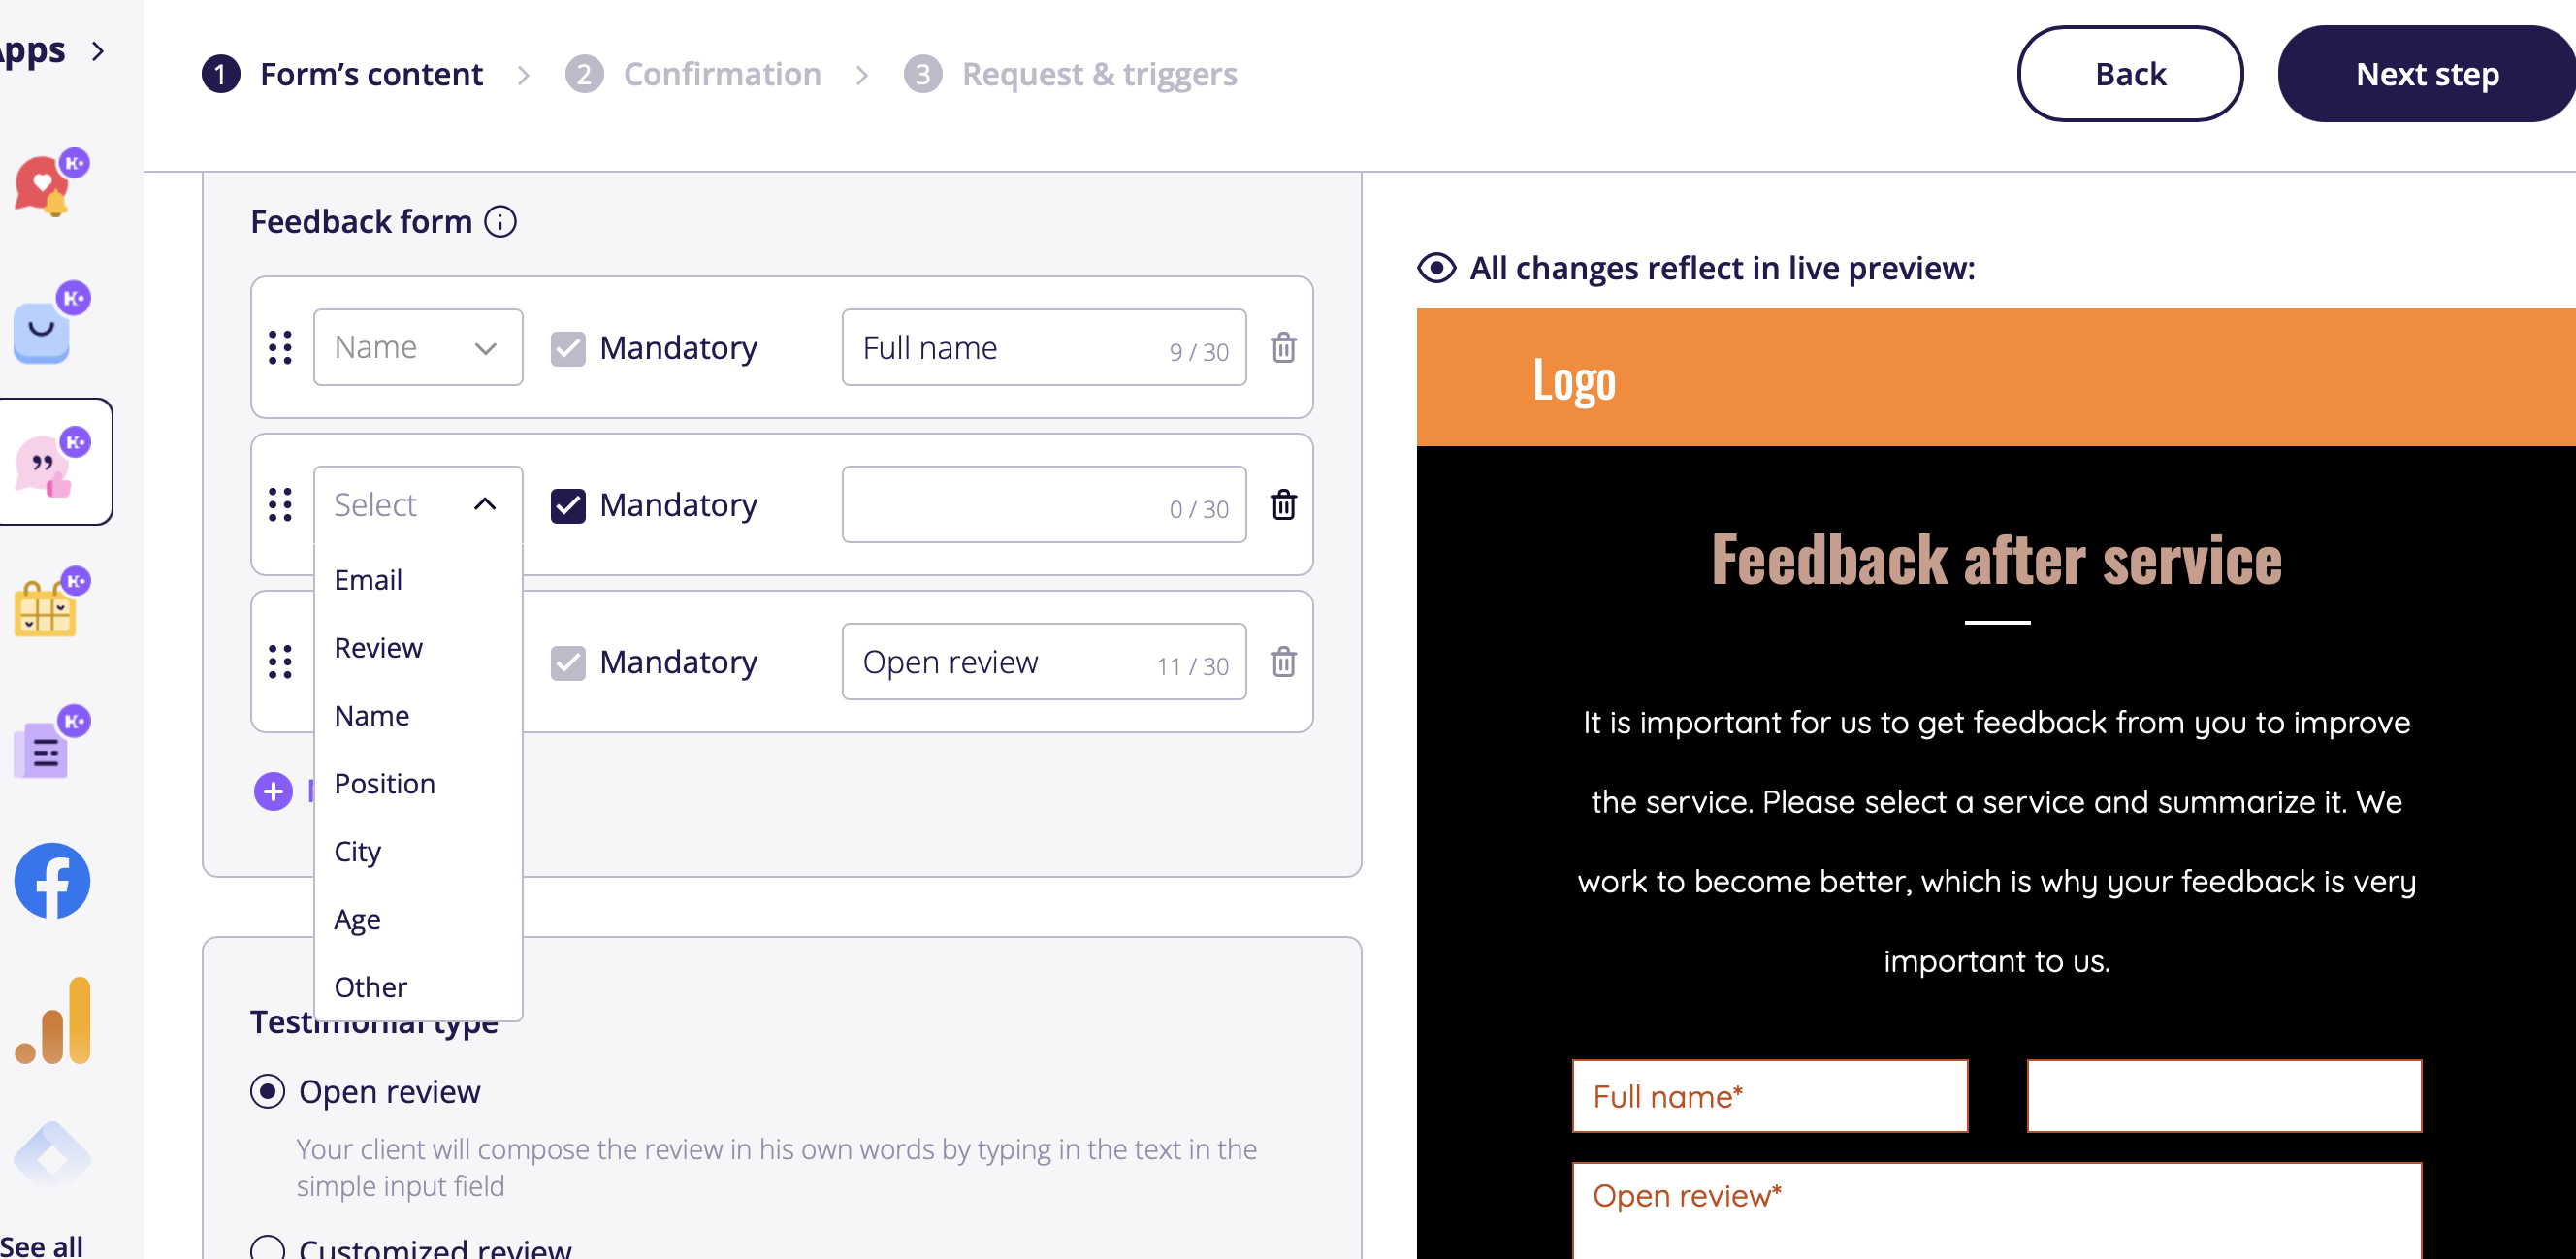
Select the type of information you’d like your clients to provide, such as city, phone number, position, email, or age. Please refer to the screenshot below for guidance.

-
You can select the type of testimonial you prefer: an Open Review, where your customer writes their review in their own words using a simple text input field, or a Customized Review, where you create specific questions for your client to answer with open-ended responses or by choosing from predefined options with single or multi-select.

-
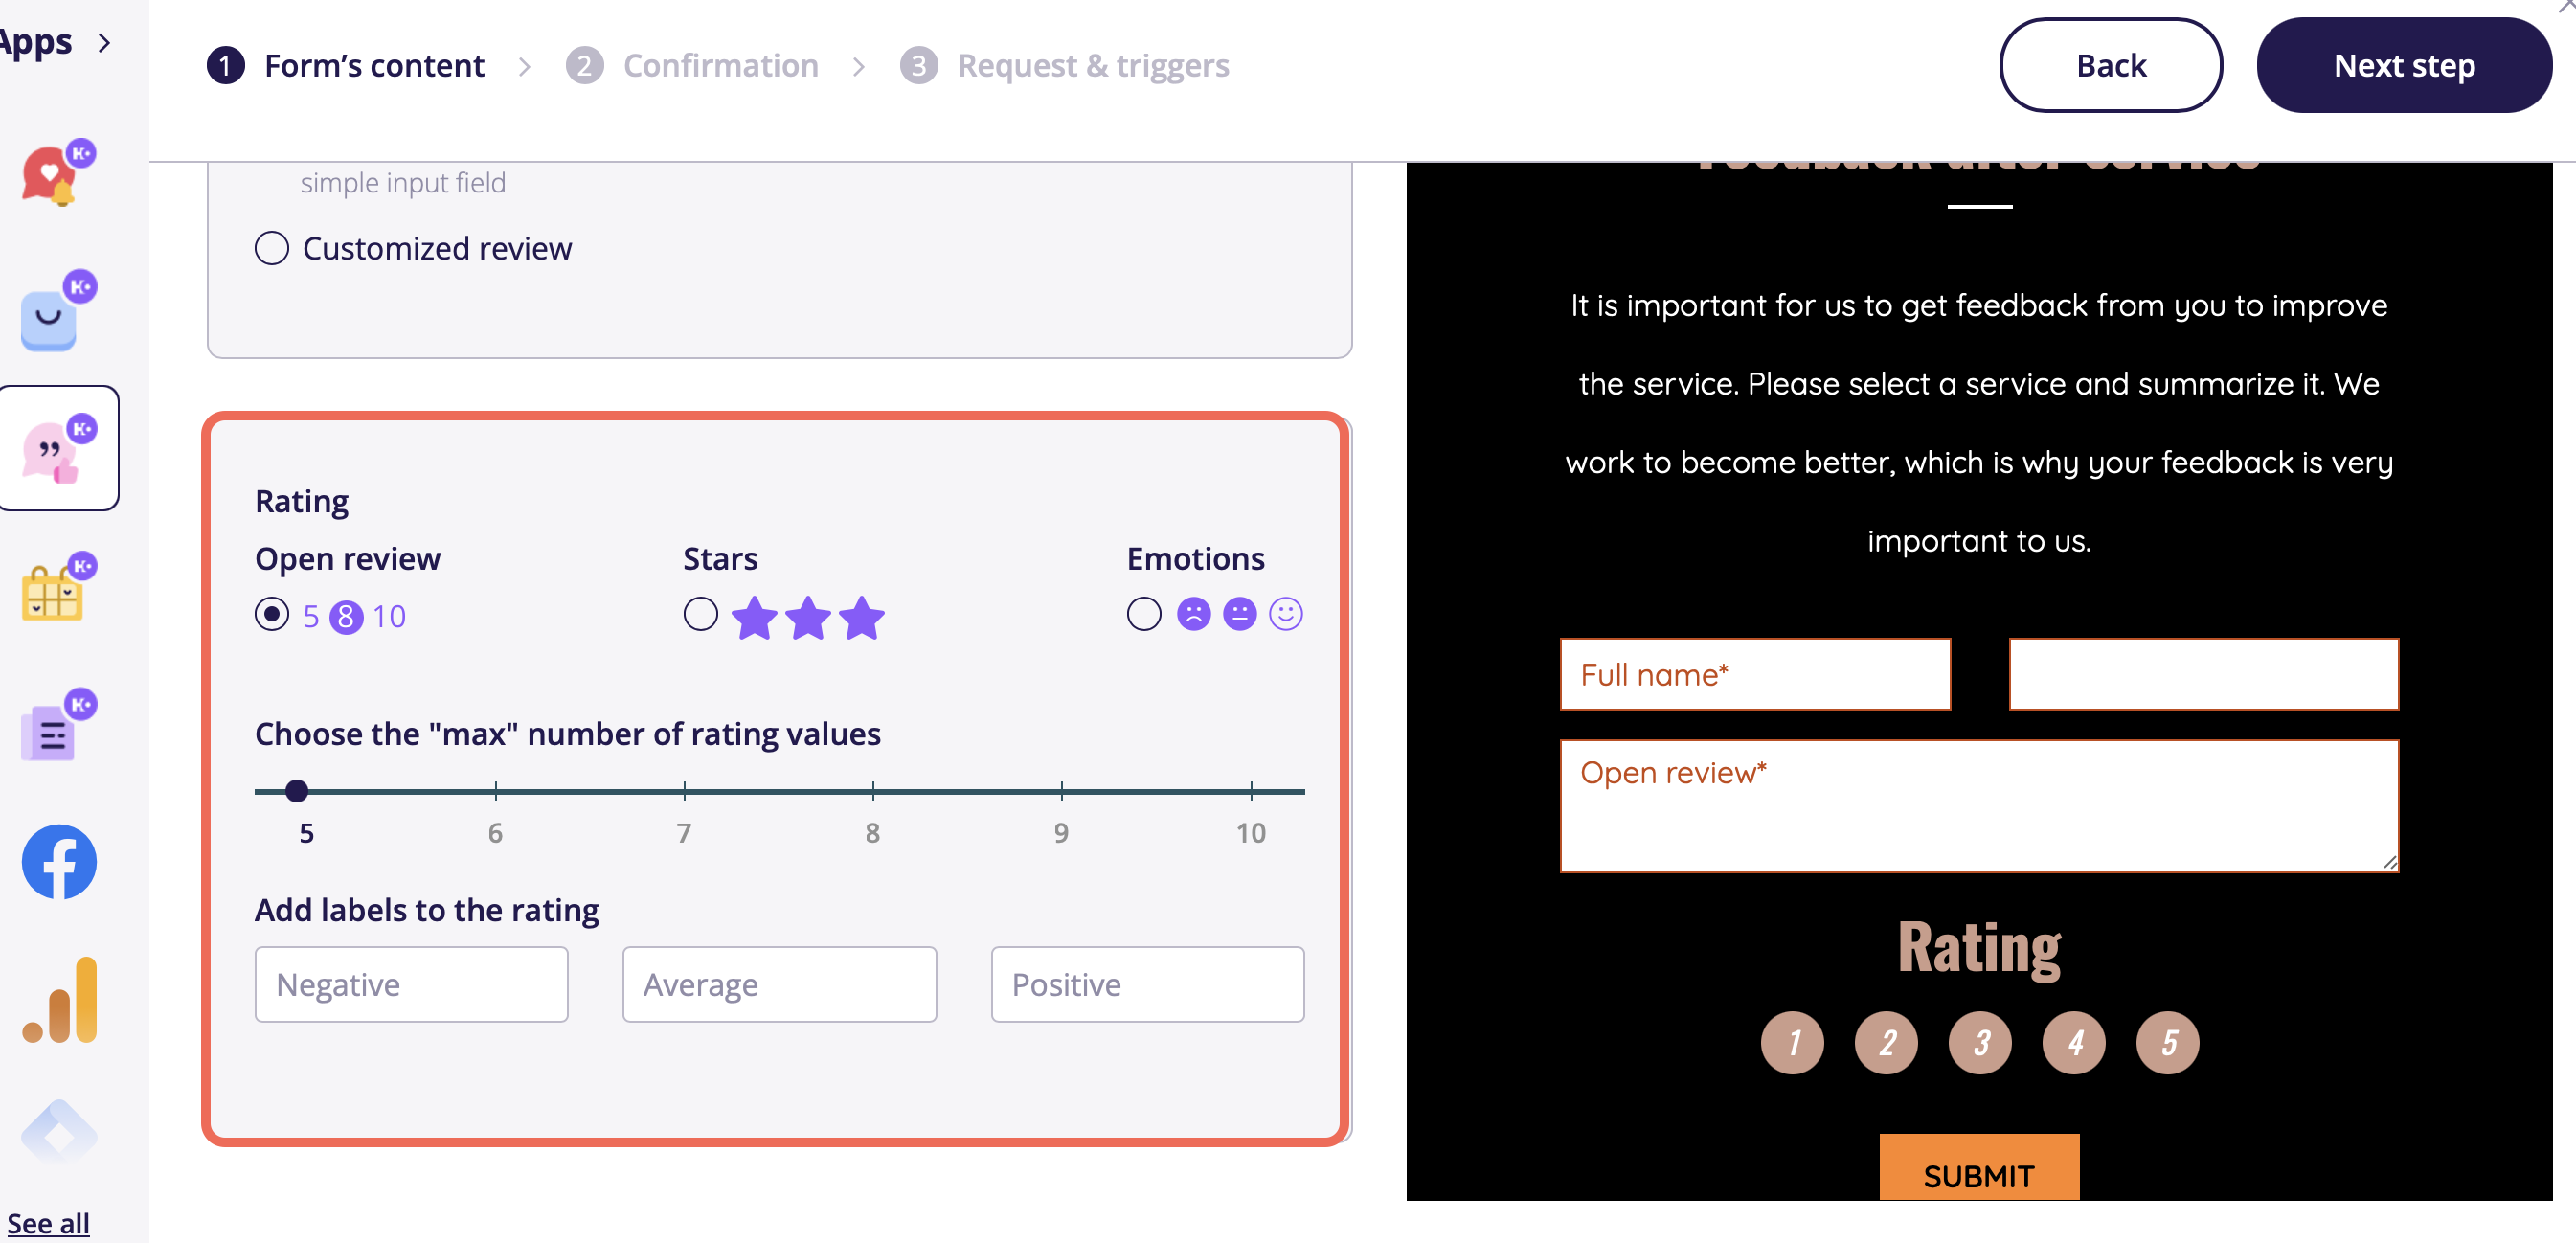
You can also include a rating for your service or product in the form to gauge how your clients rate your offerings. You can select from various scale types, and you’ll see a preview of these options on the right side.
- Once you've completed all the steps, click "Next Step" to proceed.


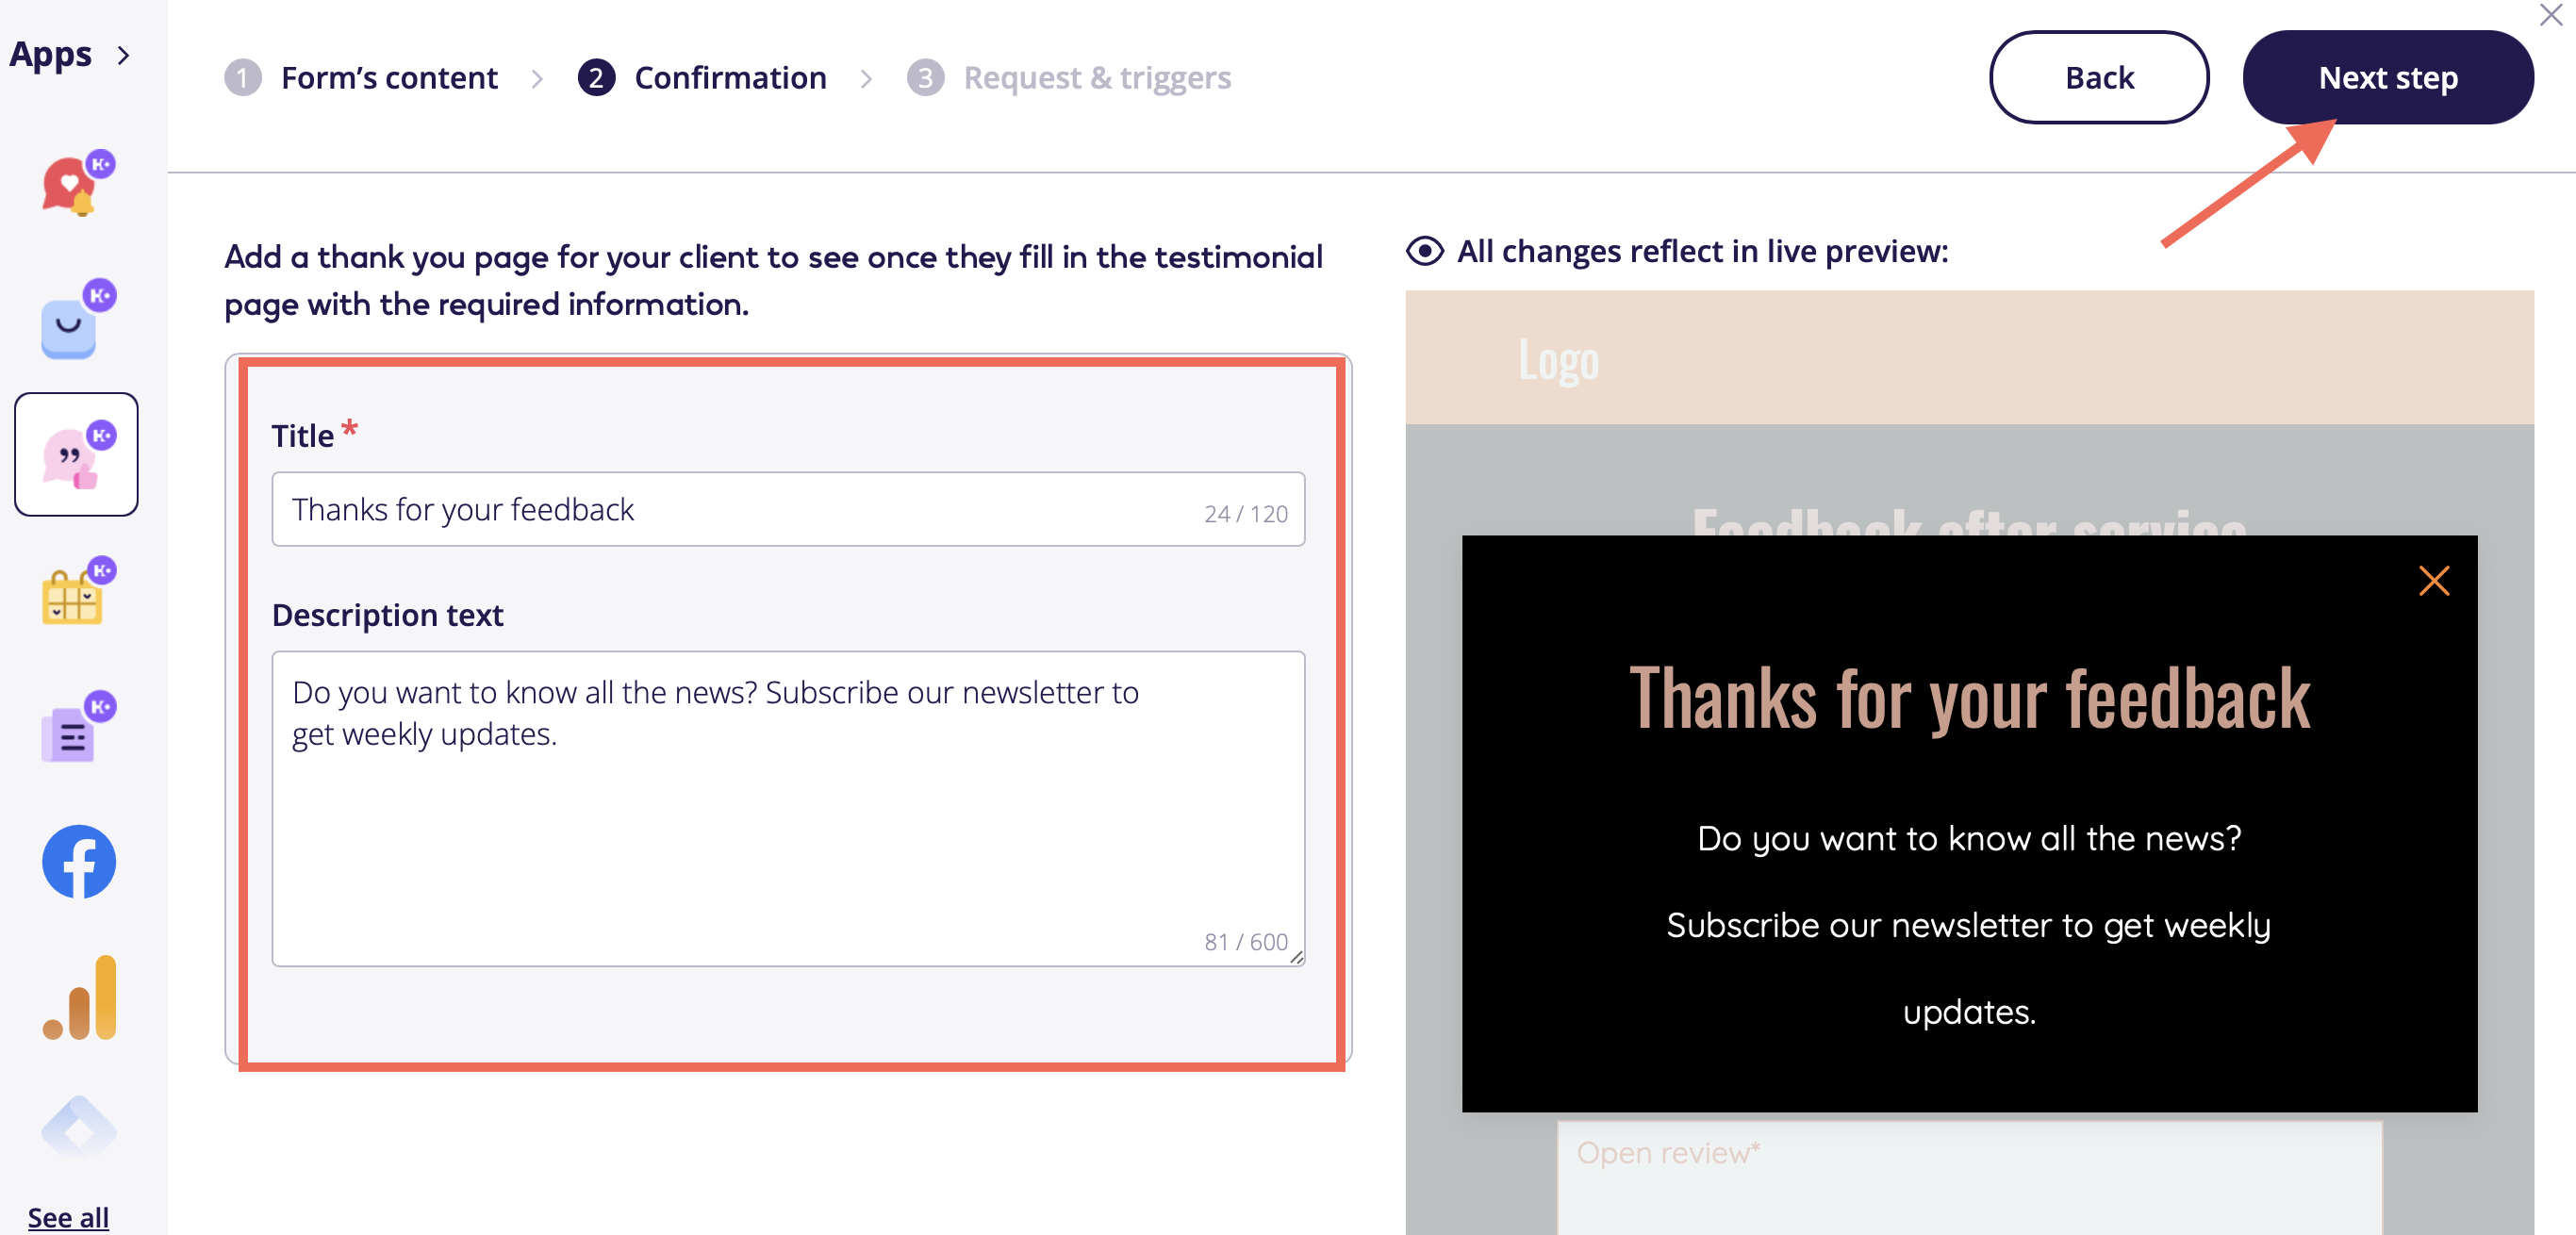
Confirmation:
- In the confirmation step, you’ll need to add a thank-you message that your clients will see after they submit their testimonials. You can either use the default text provided or create a custom message. All changes will be displayed in the preview on your right.
-
When you're finished, click "Next Step" to proceed.

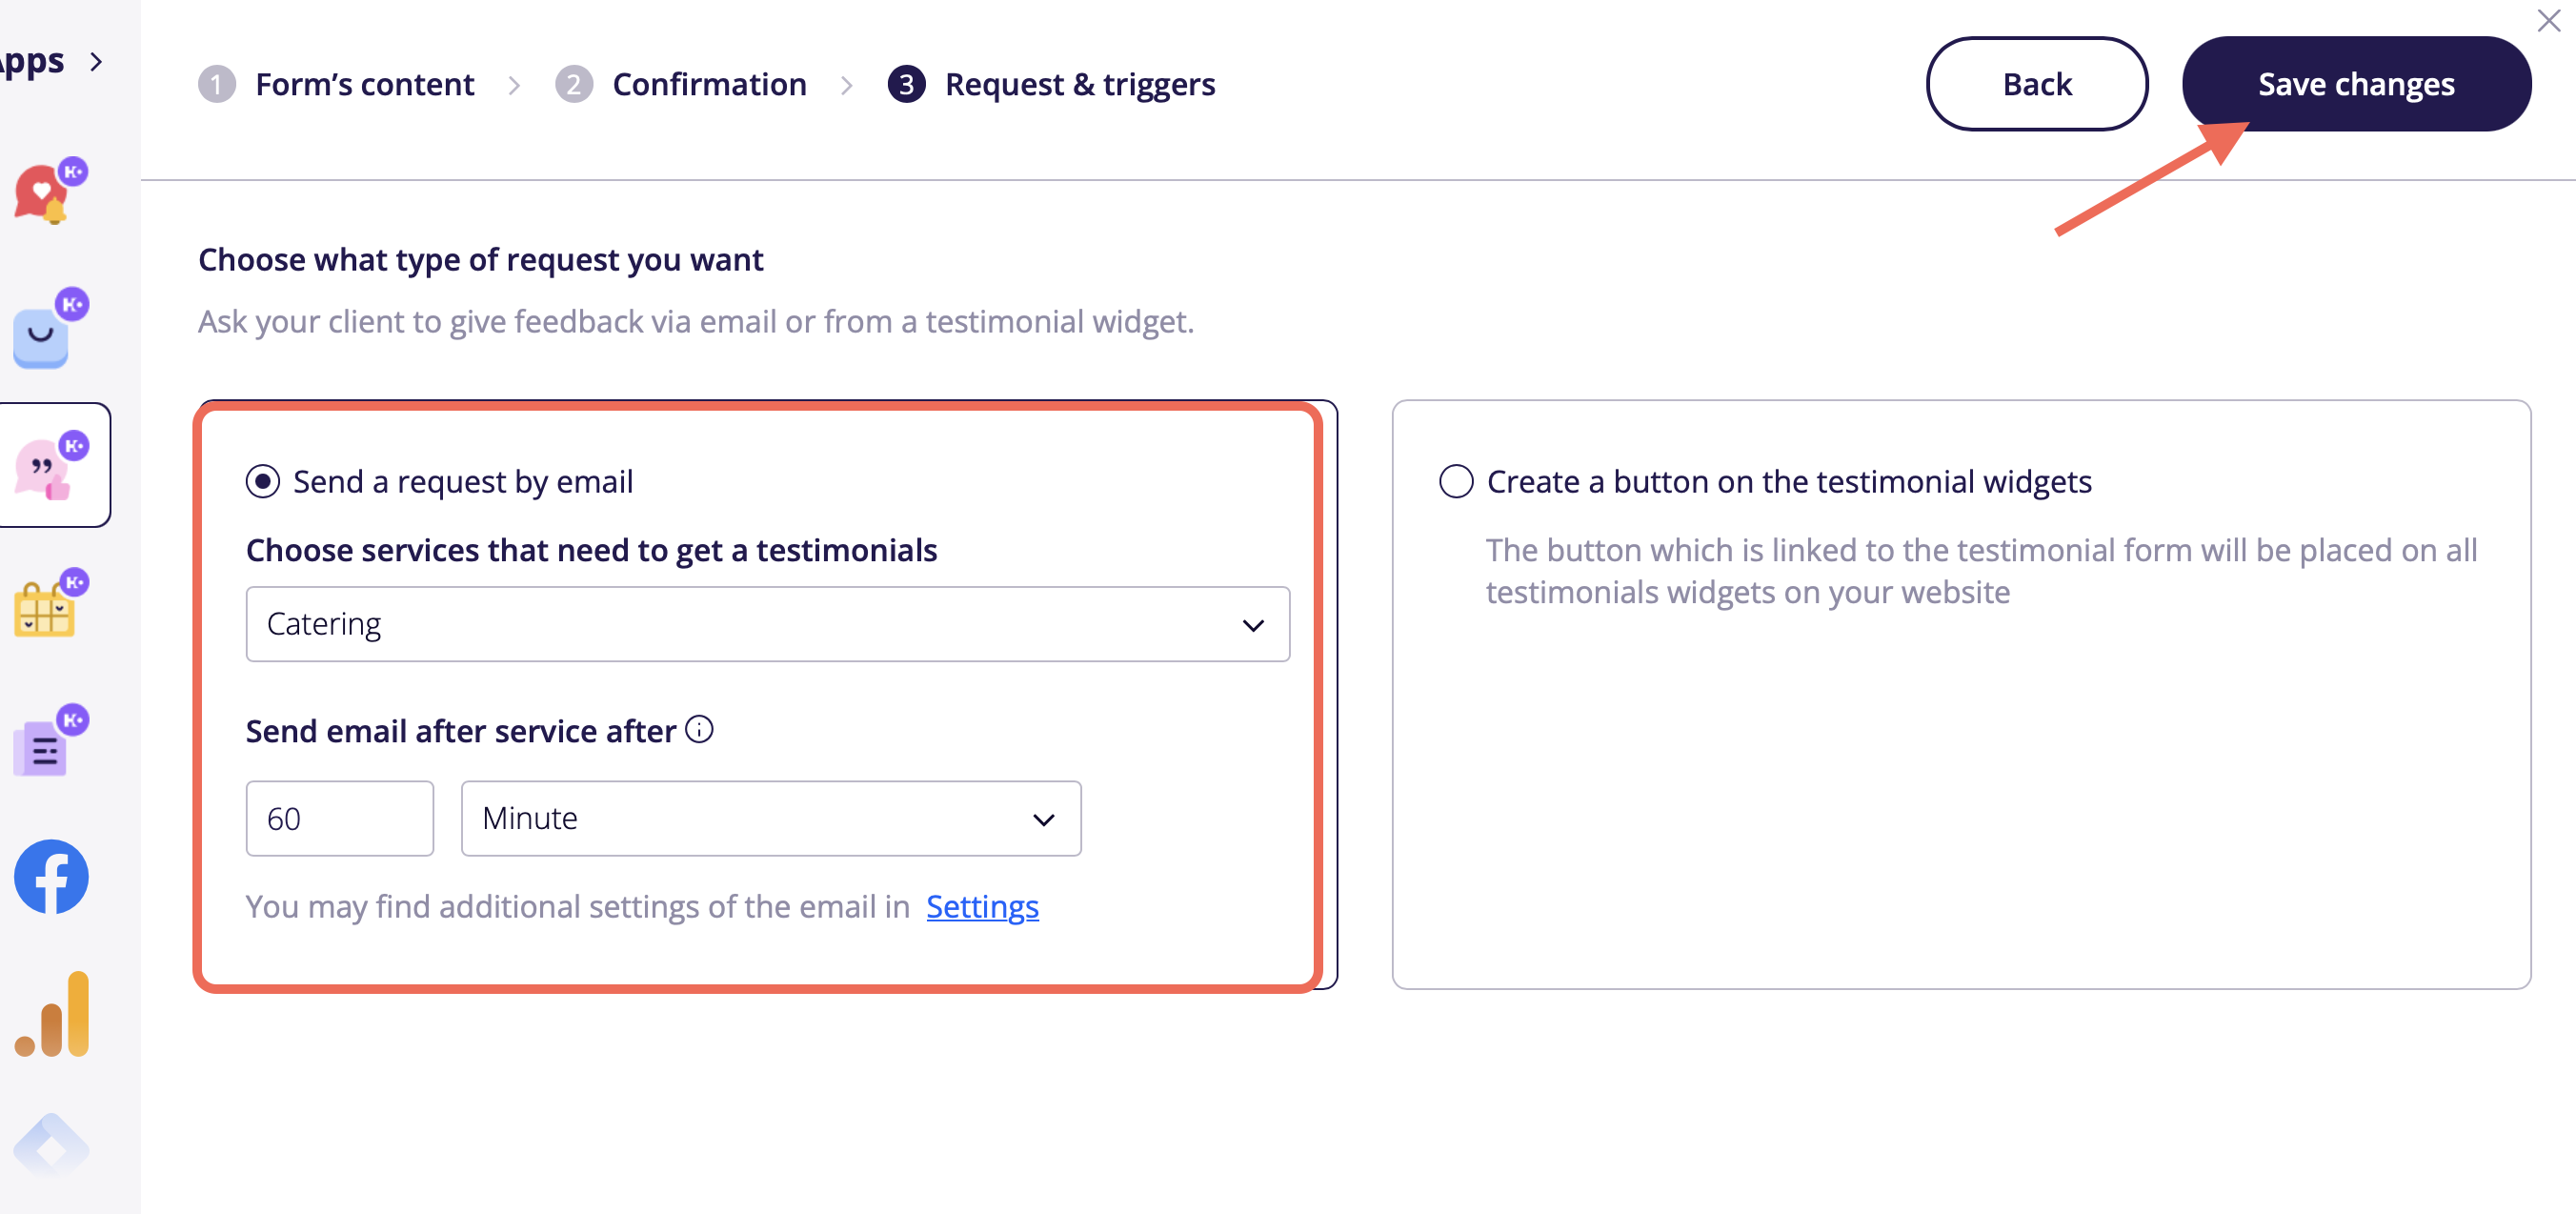
Requests & Triggers:
- Next, you’ll need to configure how your testimonial request is sent to your clients. You can choose to have them provide feedback via email or through a testimonial widget.
- Additionally, you can select which services require testimonials. If you offer multiple services, you can create a separate form for each one, or use a single form for all services—it's entirely up to you. Moreover, you can configure when your customers will receive the email with the testimonial form after the service.
-
To collect testimonials directly on your webpages and via email, just click "Create a button on your testimonials widgets"

Voilà! Your form has been created. However, if you opted to create a button for the testimonials widget, there's one more step.
- If the testimonials widget isn't already on your website, you'll need to add it to the desired page. Just click the "New Widget" button and select the "Testimonials" type.
- The Testimonials widget is designed to automatically link with any available forms. However, if you're using multiple forms, you'll need to specify which one the widget should display. To do this, click on the Star icon and then activate or deactivate the forms you wish to feature


- When someone leaves a review on your website, you'll receive a notification and can view the review in the Reviews section of your Testimonials app. You can mark your reviews as positive or negative, also copy senders email to contact them or you can remove this revie.

-
When a new review is submitted on your website, you'll receive a notification. You can then access and manage these reviews in the Reviews section of your Testimonials app. From there, you have several options: you can mark reviews as positive or negative, copy the sender's email to contact them directly, or remove the review entirely.
-
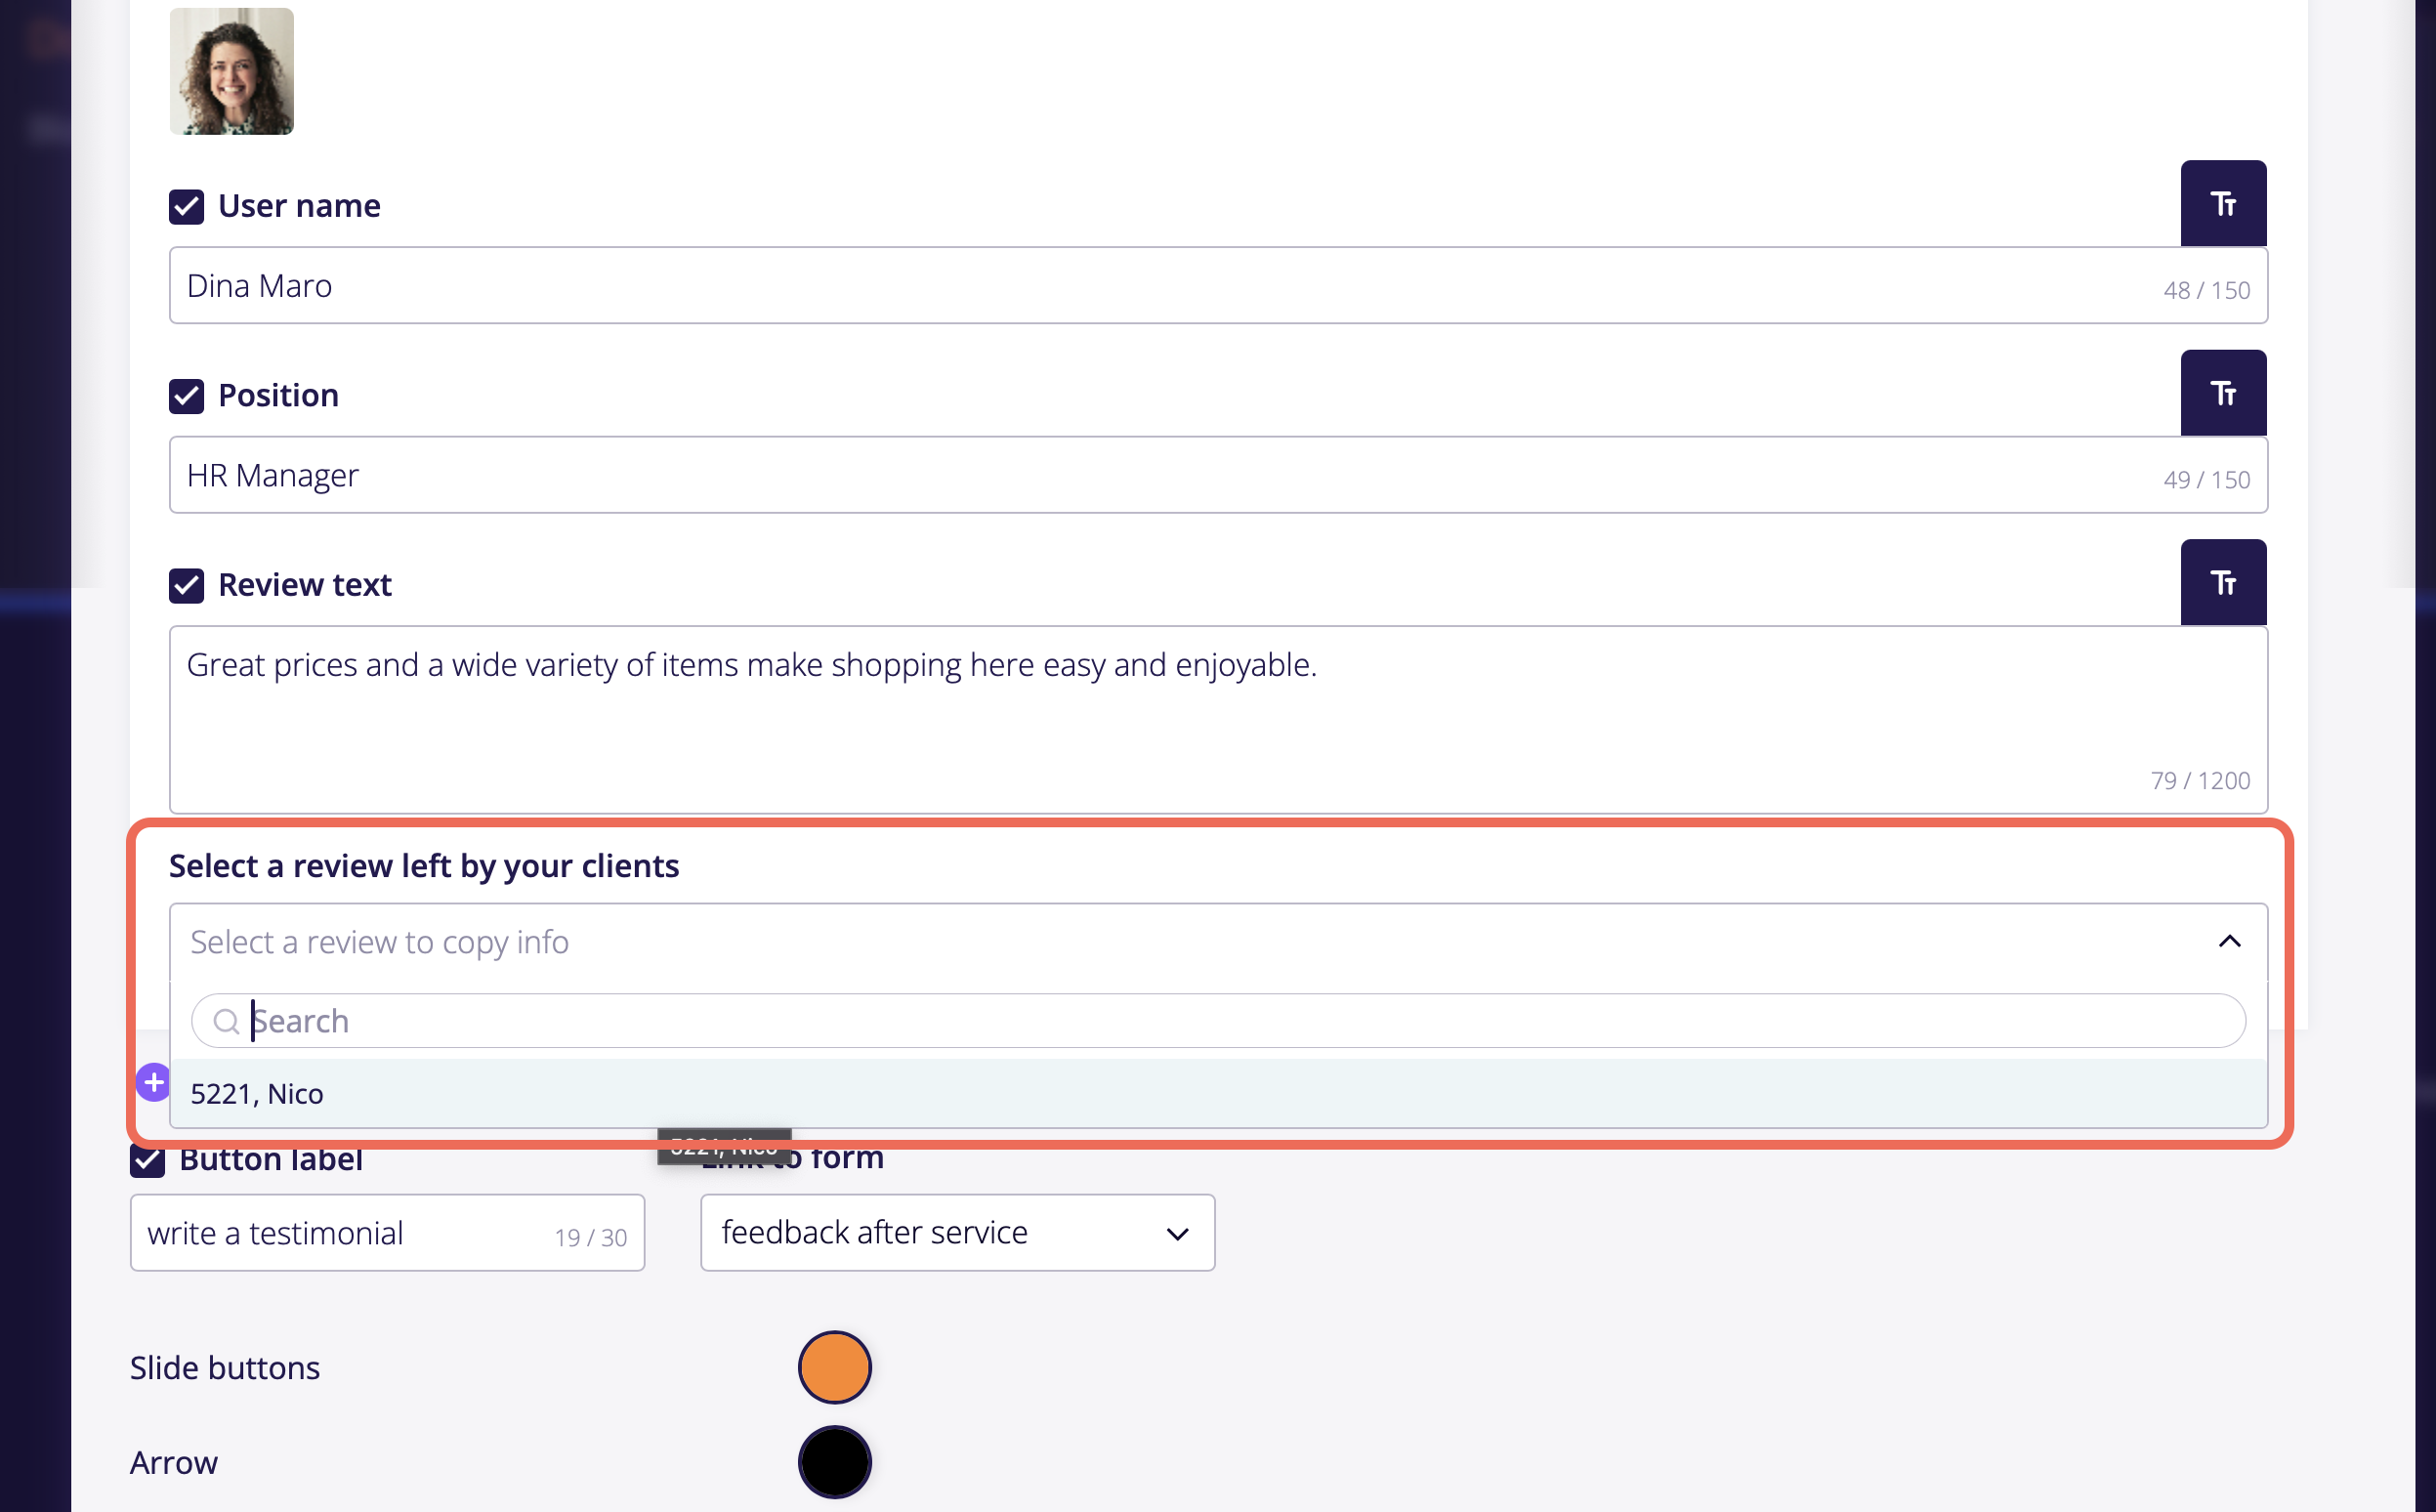
After publishing, you'll need to go to the Editor, open the properties of the testimonials widget, and click "Add New Slide" to make the feedback visible.
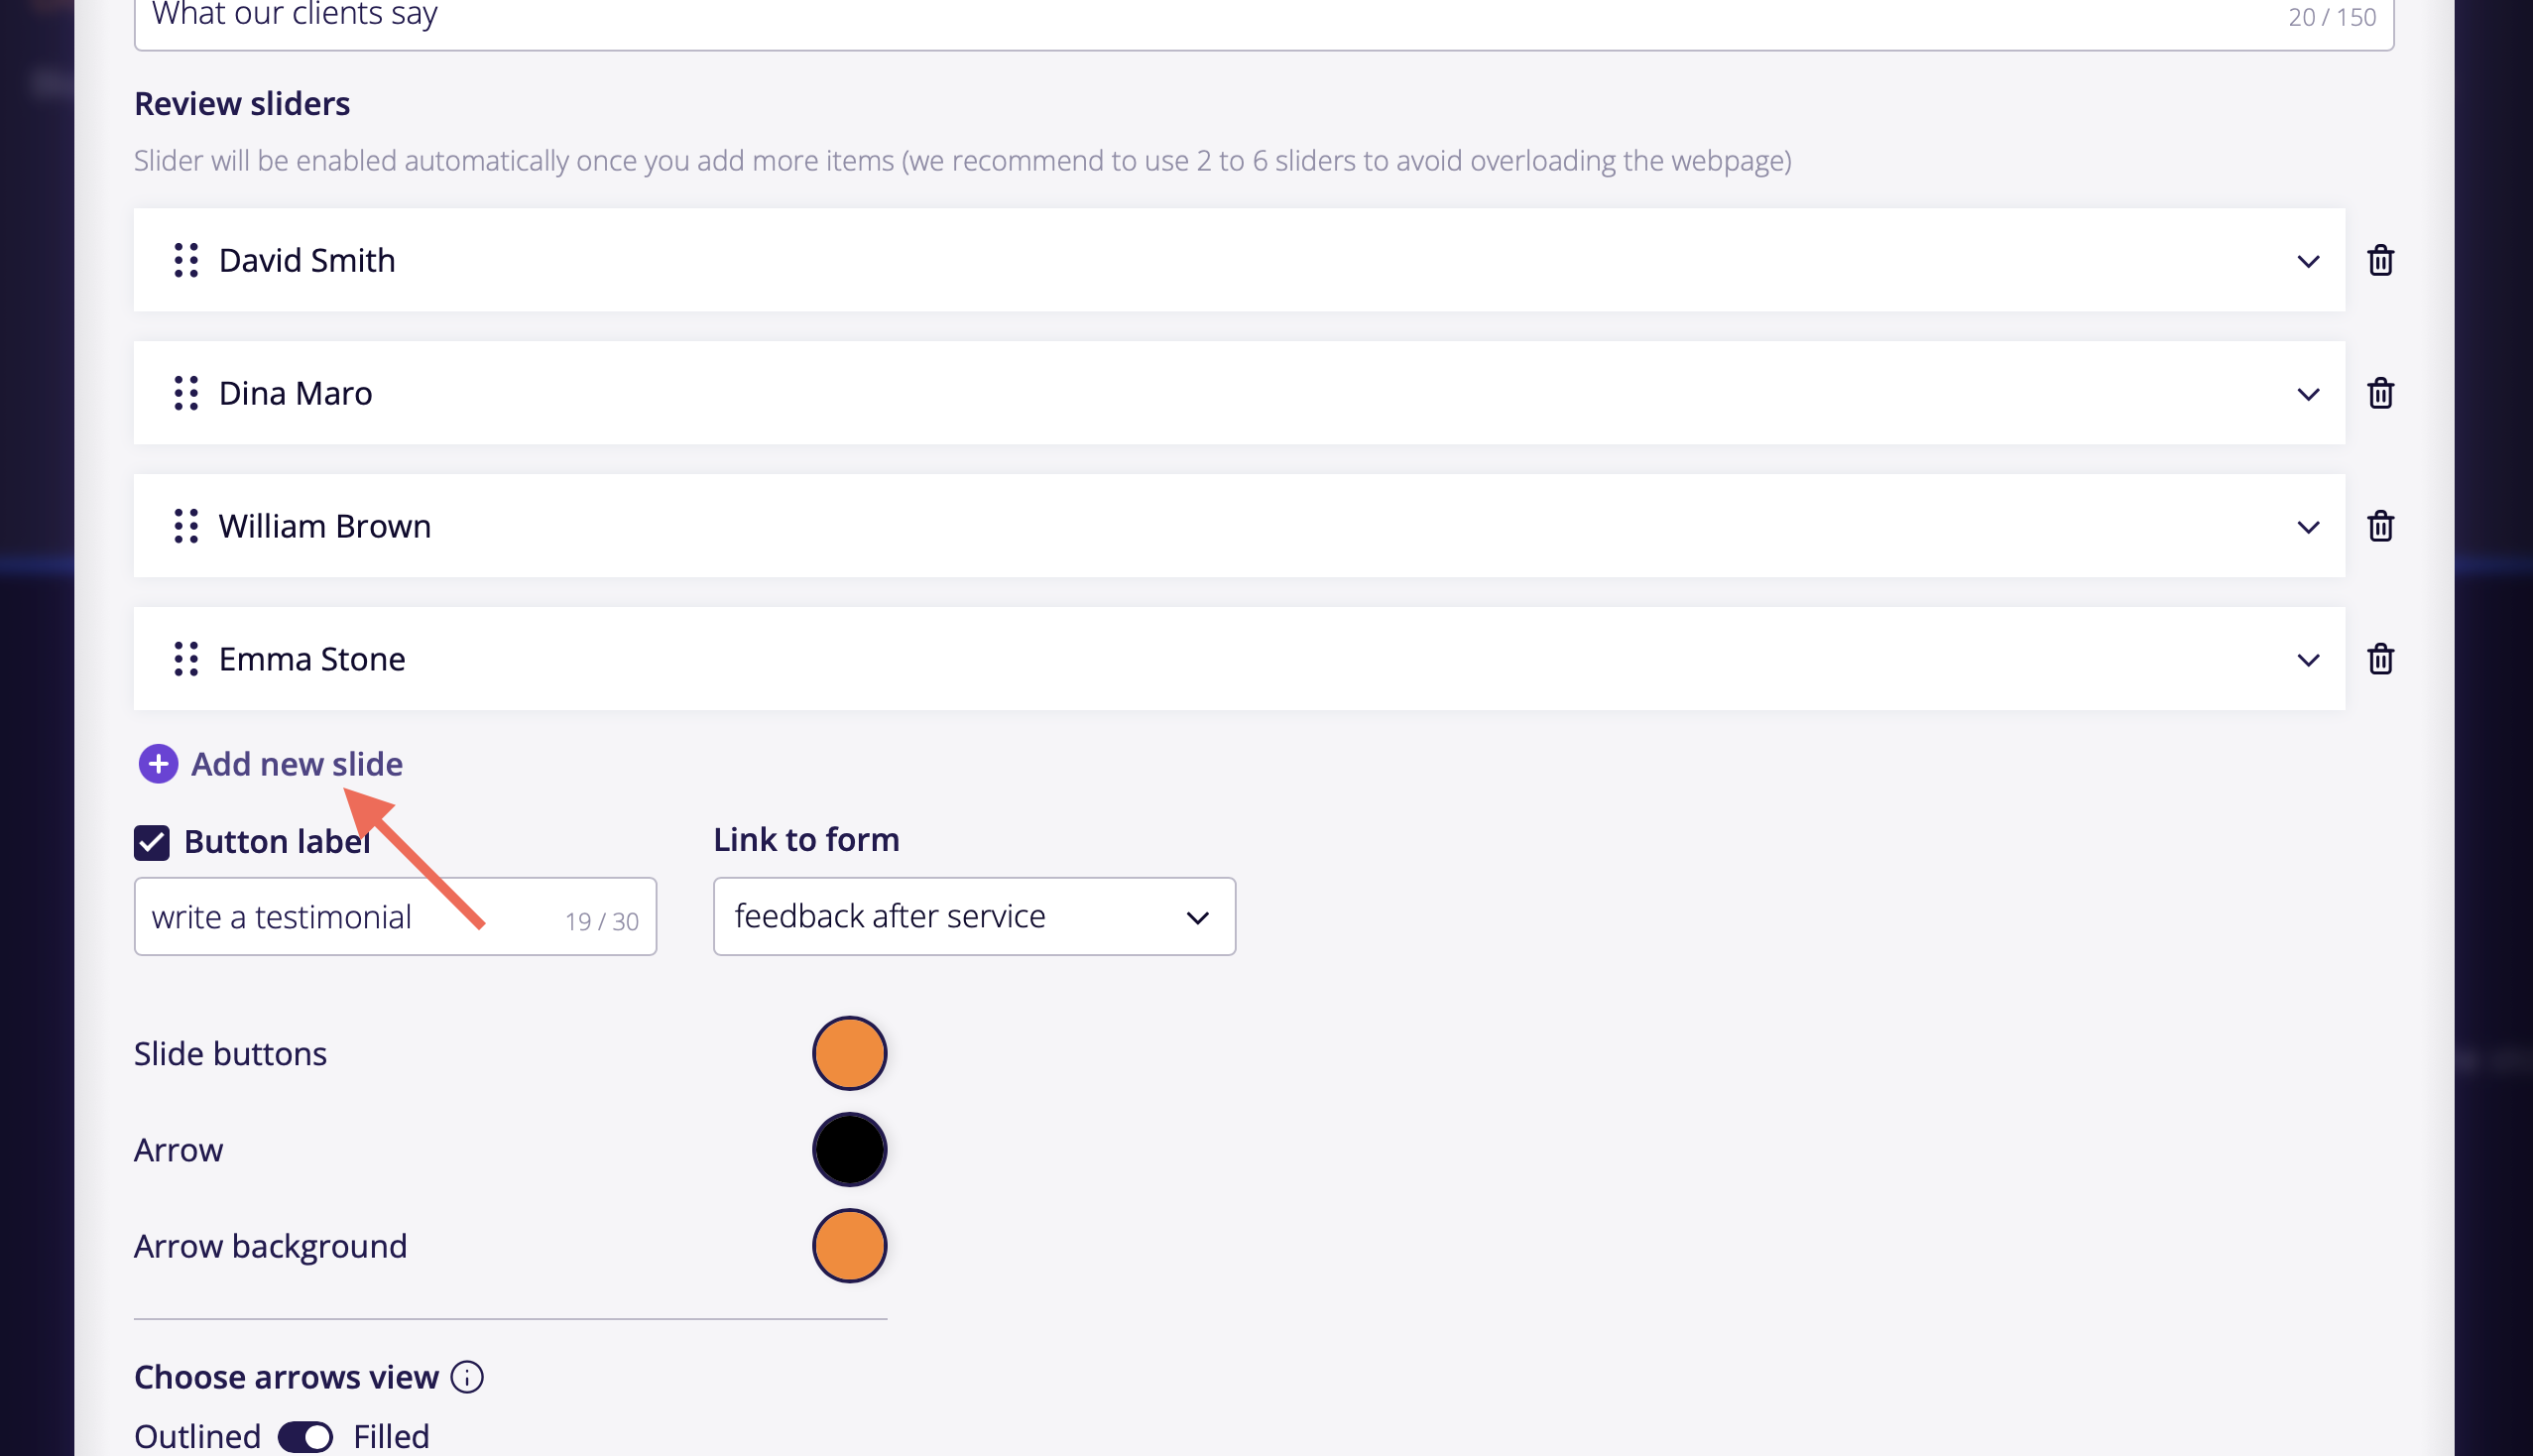
-
After that, click the appropriate slide and select the review from your client. Please refer to the screenshot for guidance.