How do I Add the ALT Text to the Image?
What You’ll Achieve by the End of This Guide: By going through this guide you will learn how to add the ALT text to the images on your website.
Benefits of Adding the ALT Text to the Image:
- Image Indexing: Search engines like Google use ALT text to understand the content of your images. This helps them index your images correctly, making them more likely to appear in image search results.
- Visually Impaired Users: ALT text is crucial for people who are visually impaired and use screen readers. It allows them to understand the content and purpose of images on your website.
- Users with Low Bandwidth: In situations where images fail to load, ALT text provides a textual description, ensuring users can still grasp the context.
- Enhanced Engagement: By making your website more informative and accessible, you create a better overall user experience, encouraging visitors to stay longer and explore further.
Why Do I Need to Add the ALT Text?
Adding ALT text is a simple yet powerful step towards creating a more inclusive and user-friendly website. It benefits everyone, from people with visual impairments to search engines and your website's overall visibility.
Steps to Add the ALT Text
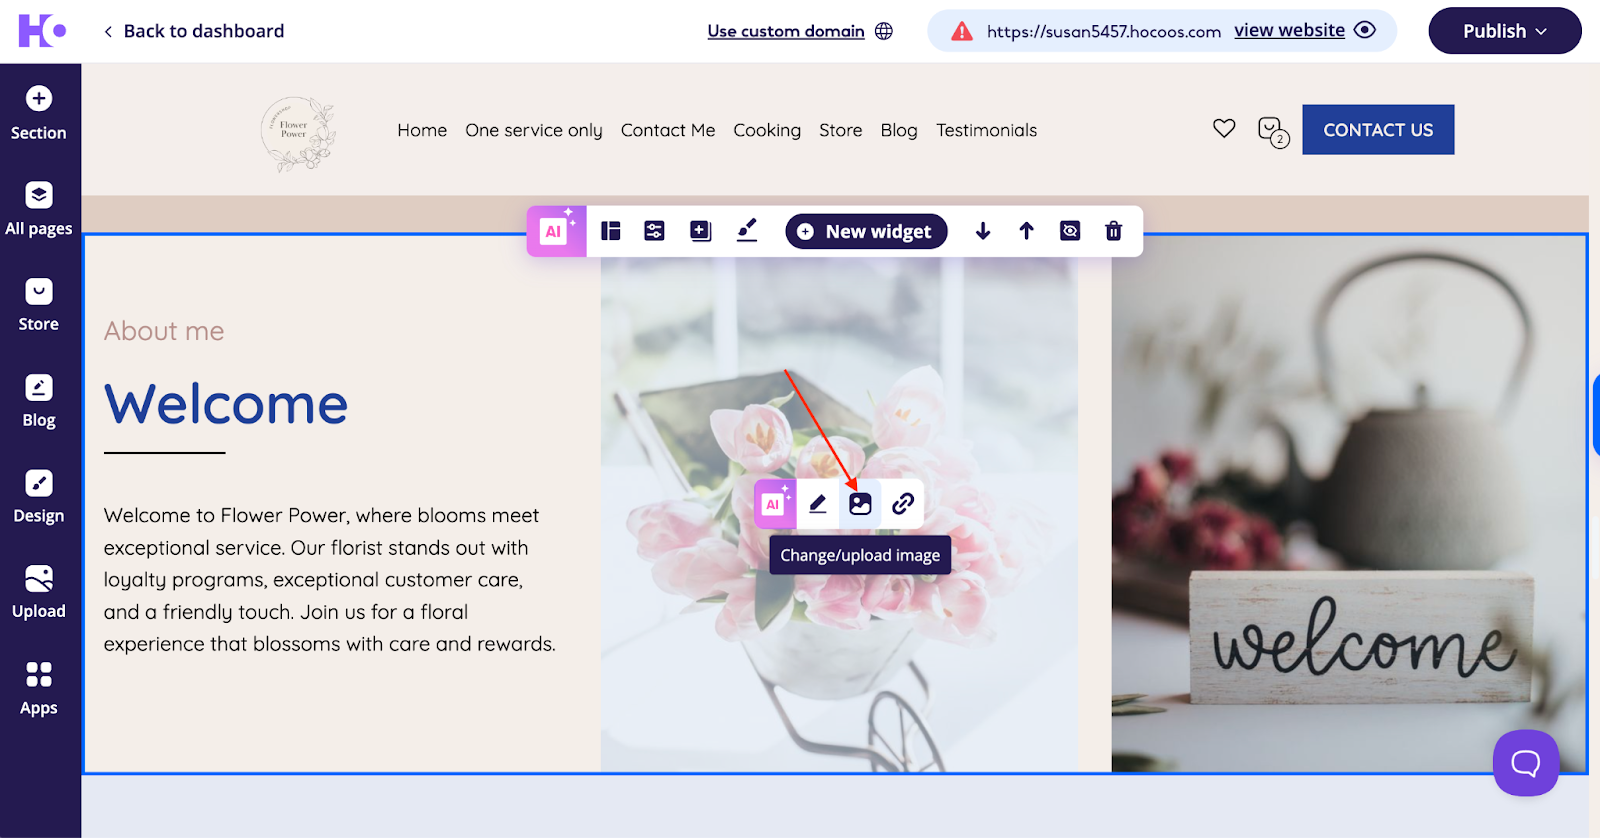
- Locate the image you want to add the ALT text to. Click the Change/upload image button.
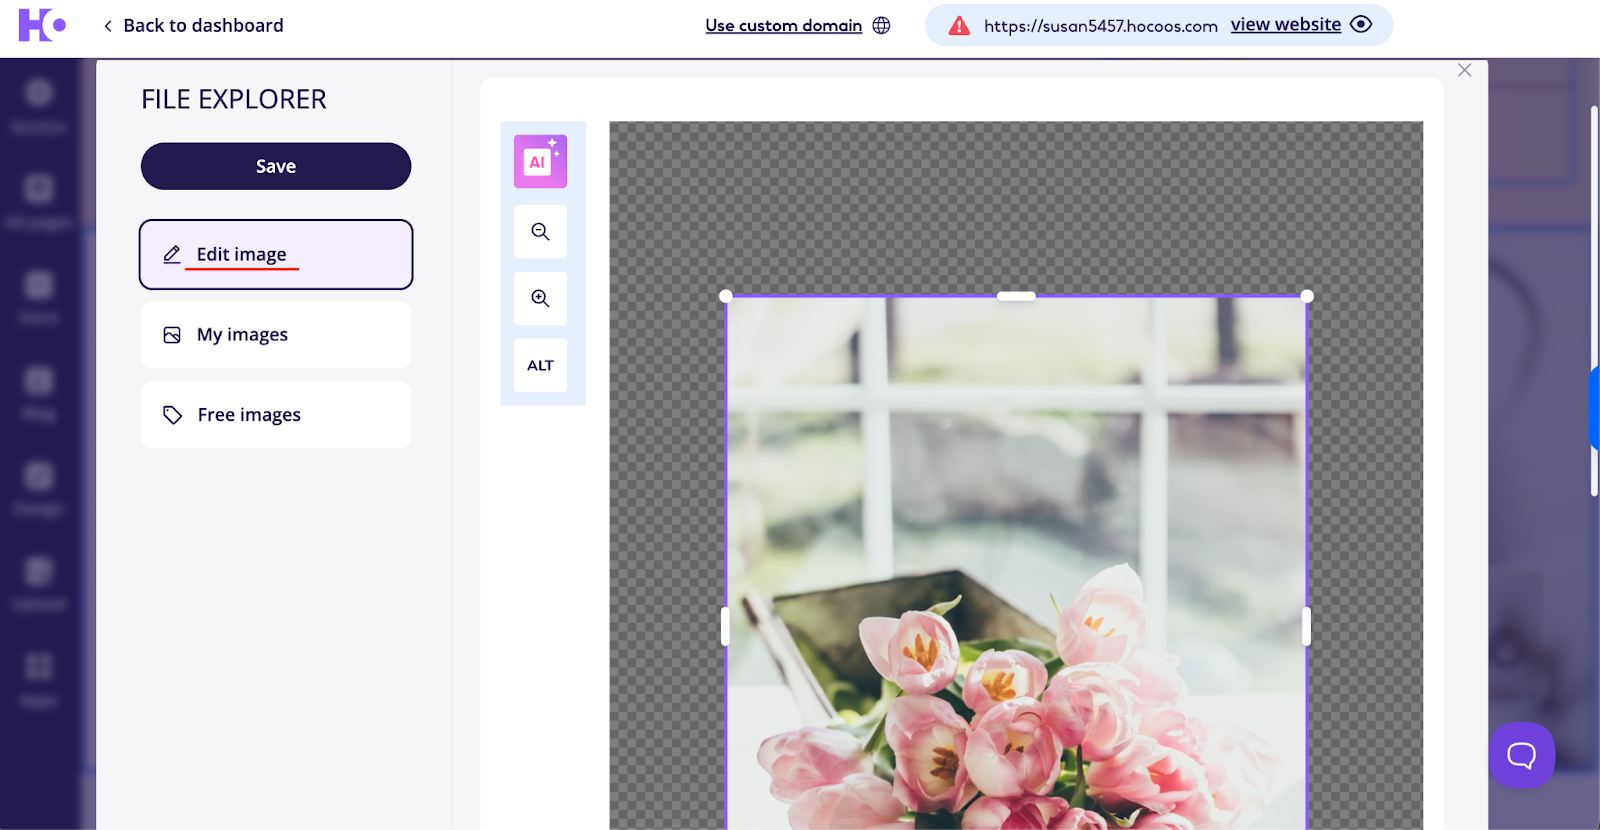
- Go to the Edit image section.
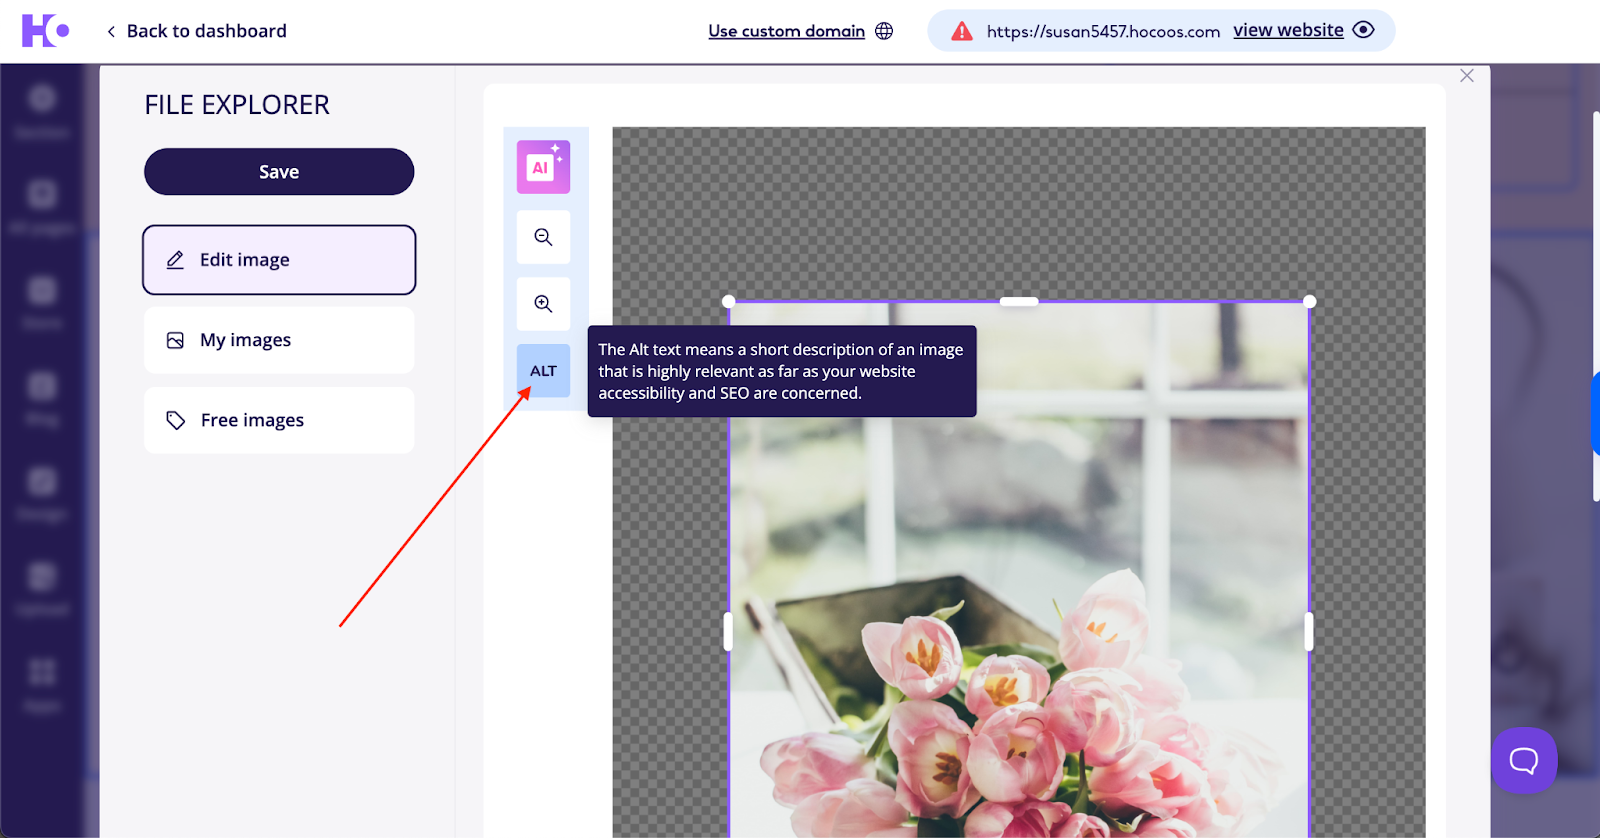
- Tap the ALT button.
Tip: Describe what the image depicts, including relevant keywords that accurately represent the image's content. Try to keep your ALT text brief - aim for 125 characters or less.
For example: If I have a picture of a bouquet on my website, I will write:
Correct: “A pink tulip bouquet lying on the windowsill.”
Incorrect: “Flower bouquet.”
Please, notice that not every picture on your website needs the ALT text. If it’s a decorative picture - leave it as it is.
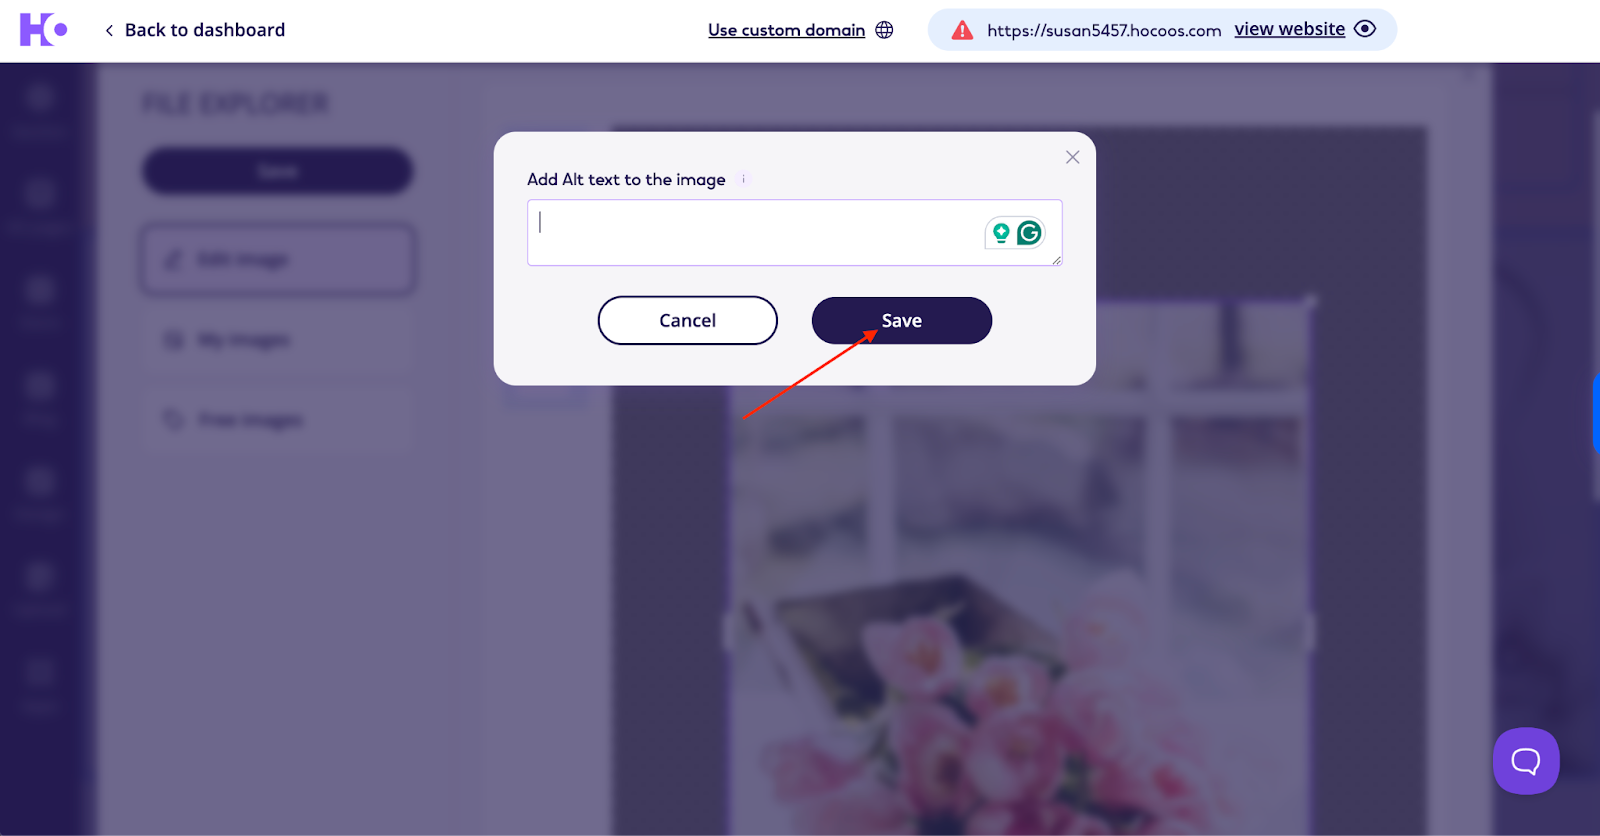
Tip: Don’t forget to tap the Save button.
Good Job! You can now enjoy all the benefits of ALT text for your images.
See Also: