Mastering Widget Buttons: a Step-by-Step Guide
This is a detailed guide about all the buttons you could possibly run into during your website customisation process.
Why button expertise is beneficial?
A solid understanding of button functionality is key. Knowing how to use different button options can significantly speed up your website's development process.
Steps to Get the Button Expertise
Start from the Widget Editor:
- Use the Widget Editor menu to customise your widget.

Tip: Today, we'll examine the Contact form widget. Notice how its button configuration is typical of other widgets.
Let’s take a closer look at all the features the Widget Editor can offer for the Contact form widget:
- The first one is - AI Redesign button.
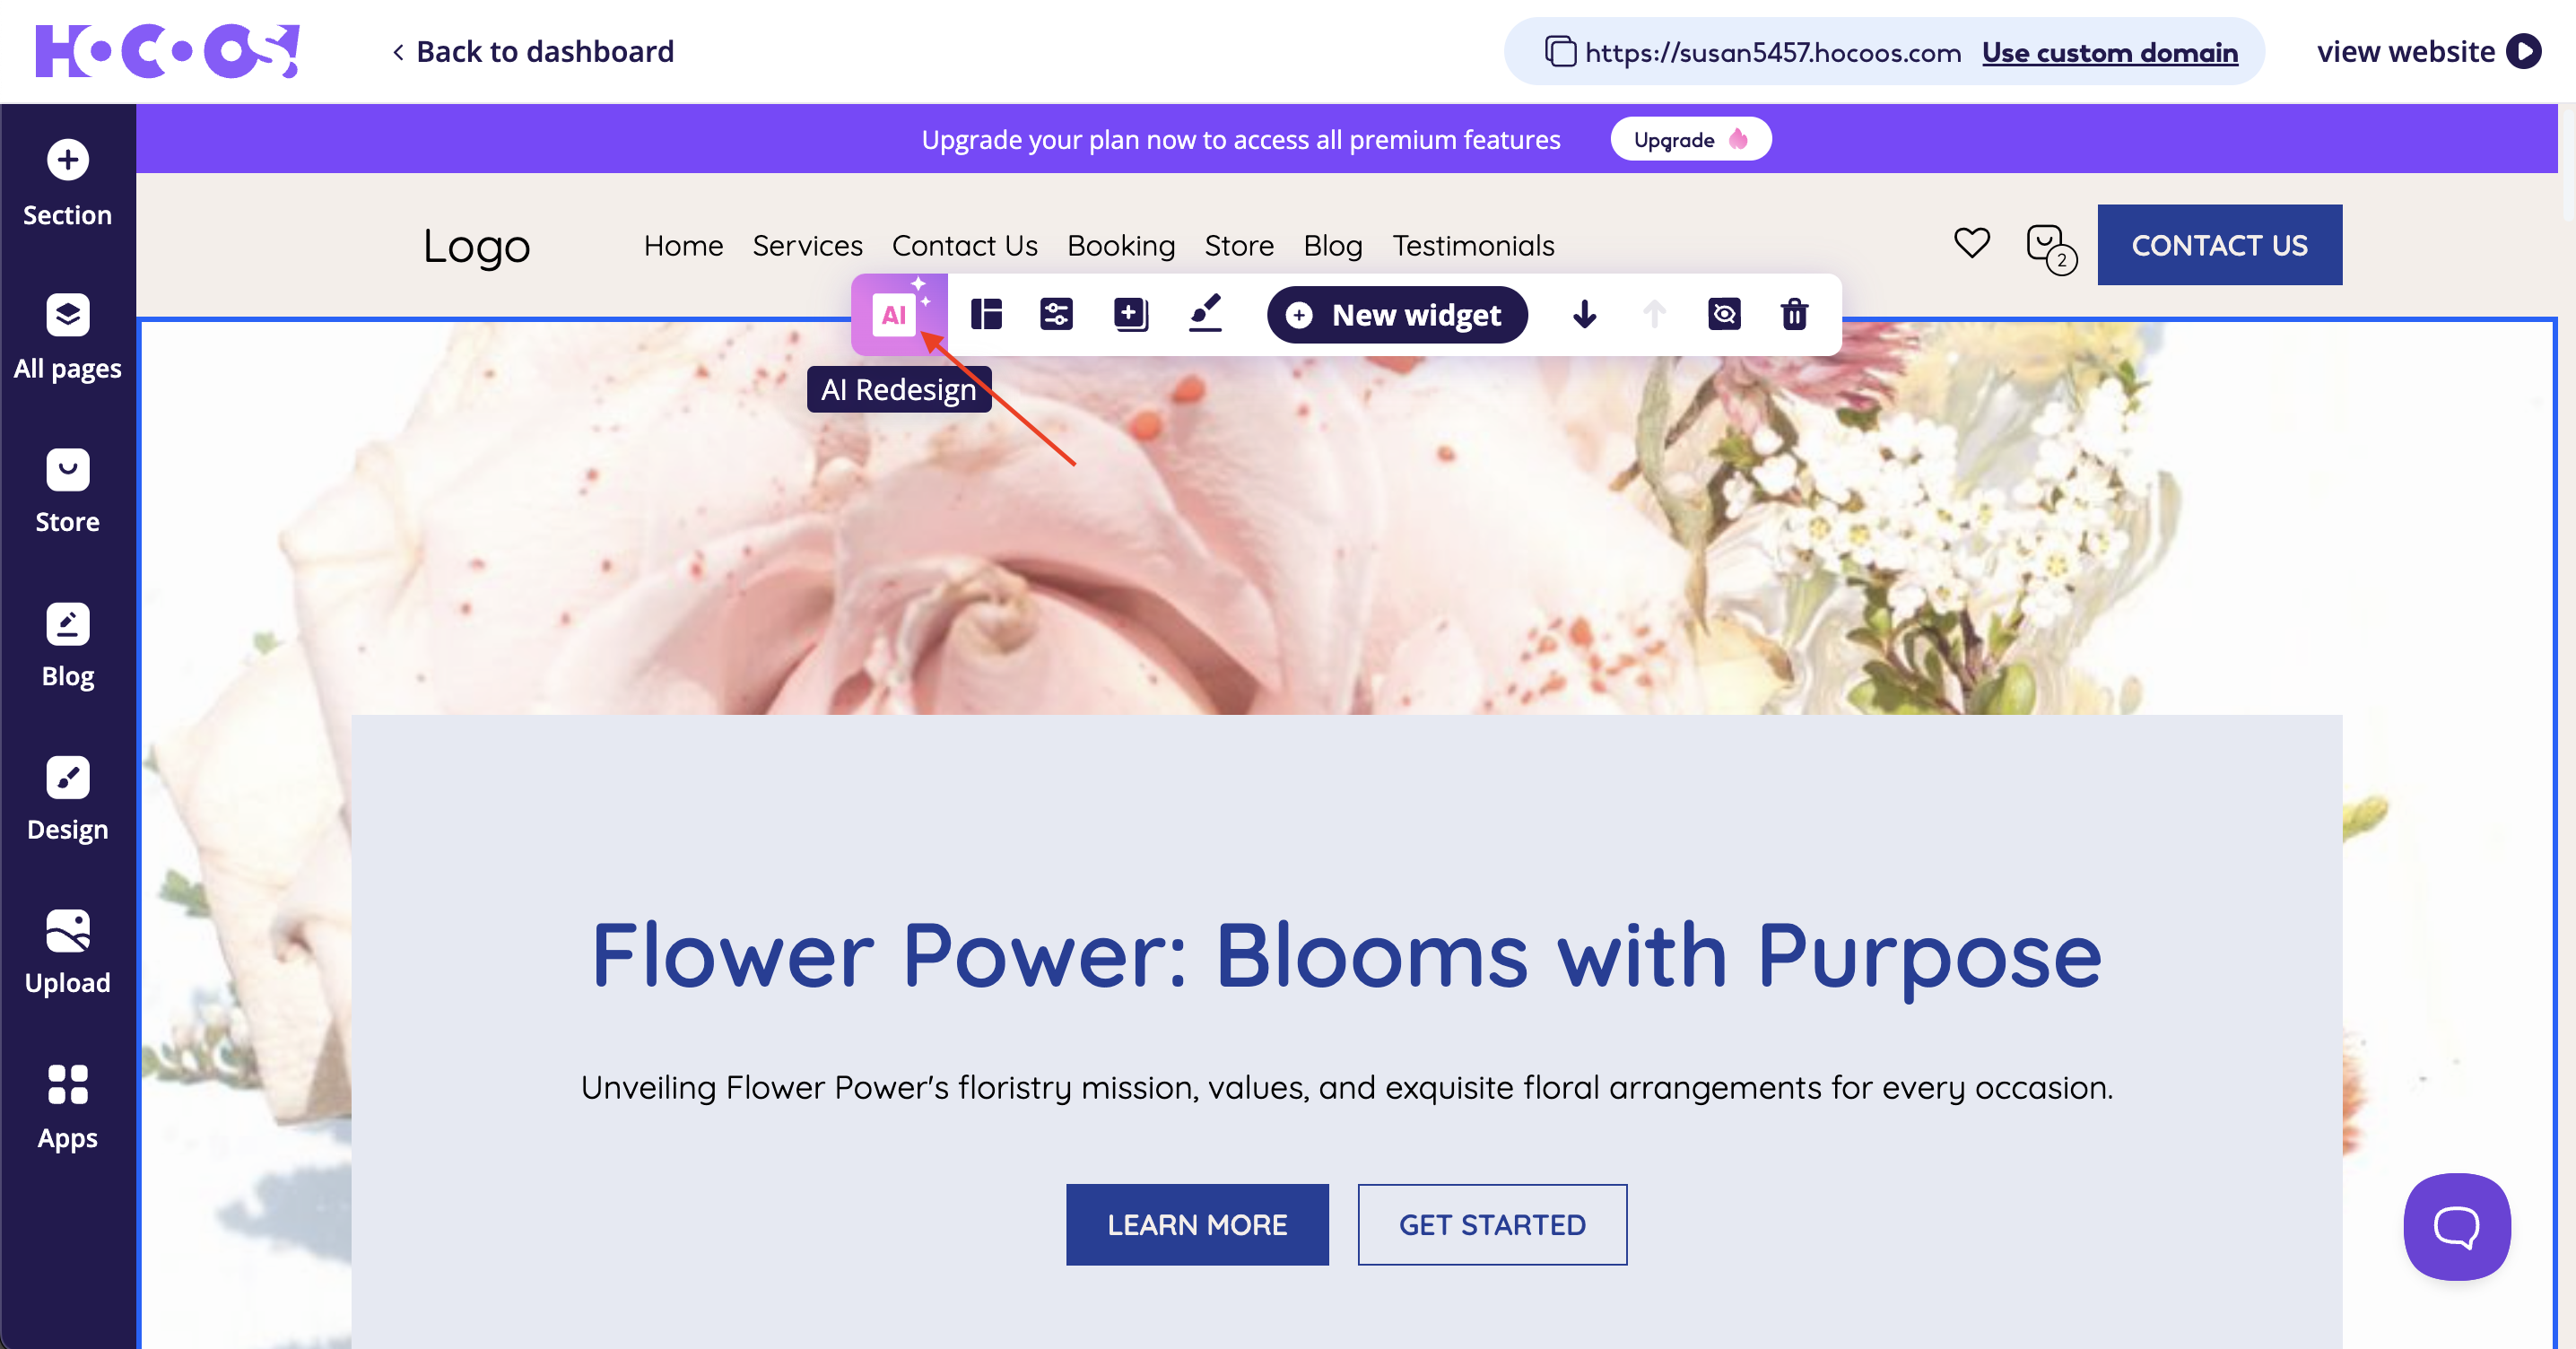
It allows you to use the AI to change the design for your widget. This button usage requires confirmation.
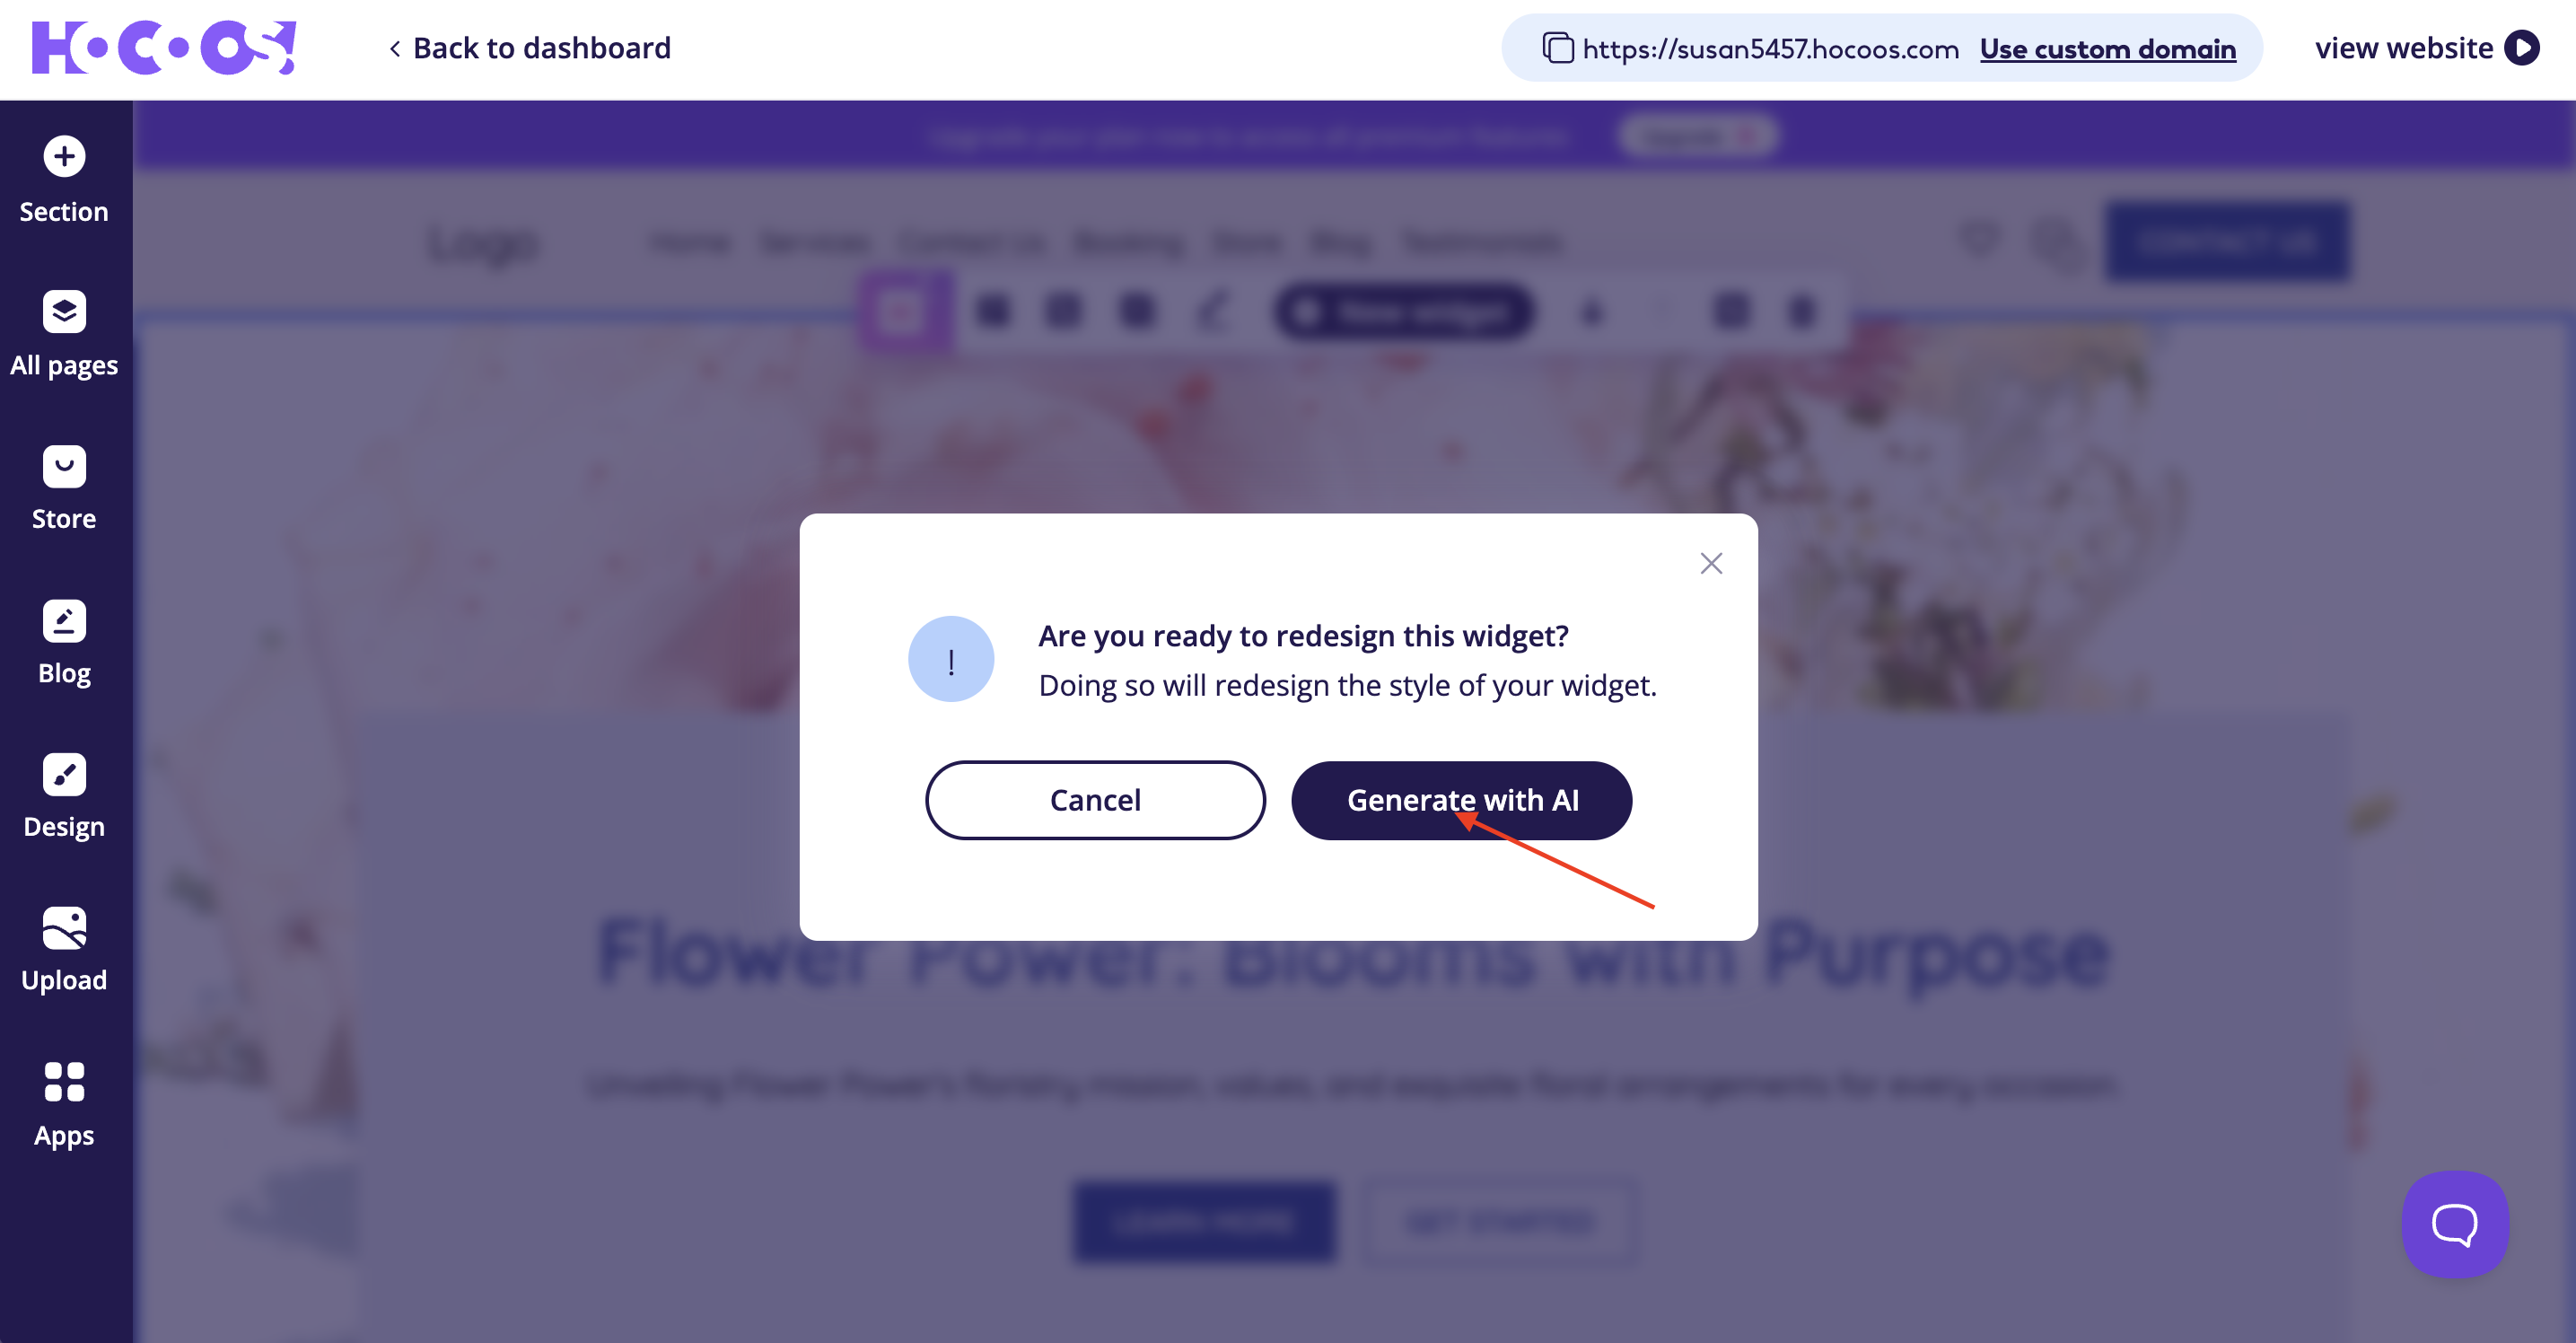
If you don't want to use this option, just click the Cross button.
- The second one is - Change variation button.
This button shows all possible variations for the widget.

Tip: Don't forget to tap the Save changes button once you choose the widget variation.
- The third one is - Properties button.
This button is crucial, as it holds the main features for your widget:
- Image icon allows you to change the image displayed in your widget (here you can put an image directly connected to the products or services you provide).

- Subtitle text, Title text and Description text fields are all editable. Put the tick into the checkbox near the field, if you want to view it. Remove the tick from the checkbox to hide the field.

- Contact form - the main block of the widget. Here you can rename the fields and set some of them as mandatory. Notice that the name and look of your widget's main block can differ.

Tip: To rename the field click on it and enter a new name. Put the tick into the checkbox to label the field as mandatory, otherwise remove the tick from the checkbox to label the field as not mandatory.
- The Trash bin button gives an opportunity to remove all the fields that aren’t necessary. To add more fields use the Add Custom field button, located right under the main block of the widget.

Tip: Pay attention when editing the fields for your widget, as each field has its own required piece of data.

Features of assigning the field as mandatory and adding custom fields are available only for Premium accounts.
- Button block allows you to change the Button label (button name), Confirmation title and Confirmation message texts.

Tip: Try to keep the button name short, so it will agitate to the certain action. Work on the Confirmation message text as it shows your attitude towards the customers. Make sure to click on the Save button!
- The forth one is - Widget design button.
The Widget design button allows you to experiment with the Widget colors, change the Widget spacing and decide on the Widget width, which can be useful too.

Tip: Changing the widget colors, remember that text color should be readable - choose the background color wisely.

Tip: Make the spaces between things in your widget bigger to make it look less crowded.

Tip: Narrow widget width is more tightly packed, than wide - choose the one that is more appealing to you.
- The fifth one is - New widget button.
The New widget button gives you an opportunity to add another widget to your website’s page.

- The sixth one is - Move down widget/Move up widget buttons.
These small features can create a better hierarchy and make the whole page look more logical.

- The seventh one is - Hide/Show button.
The Hide/Show button contains some options for enhancing the widget's visual appeal.

Here you can choose whether you want to hide from view some of the strings, like Subtitle, Title, Description and Divider.
- The last one is - Remove button.
The Remove button helps to delete the widget.

Tip: If you change your decision you can undo the change, by clicking on the Undo button in the toast notification in the right top corner within 5-8 seconds.

You're Ready to Go! Now that you know exactly what each widget button does, you'll find customizing your site a much smoother experience.
See Also: